

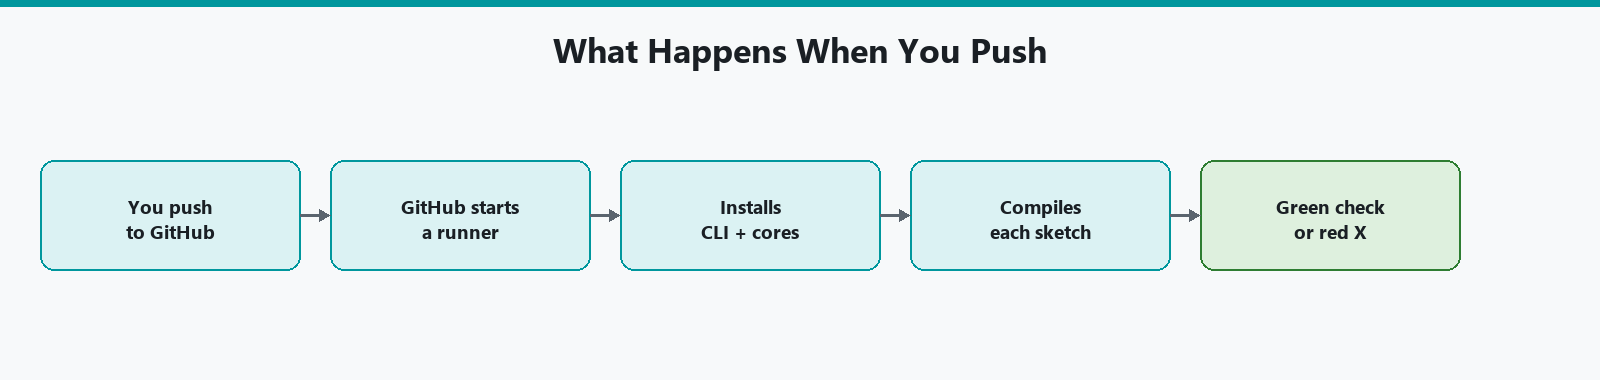
GitHub Actions is GitHub's built-in CI: a computer in the cloud that runs a script when you push code or open a pull request. CI means continuous integration. For Arduino, the useful job is: install Arduino CLI, install cores, compile every sketch. If compile fails, the pull request (a proposed change waiting for review) shows a red X. You find out before you merge it into the main code.
You do not upload firmware from GitHub's hosted runners. Those machines have no Uno on USB. Compile is the check. Artifacts (saved .hex files) are optional. Hardware upload stays on your bench.
Part 3 of the Mastery Series is the sketch language. This article is a workflow file in .github/workflows/. Arduino publishes two Actions that matter here:
arduino/setup-arduino-cli@v2putsarduino-clion the runner.arduino/compile-sketches@v1compiles a list of sketches and can install platforms and libraries for you.
Pin major versions (@v2, @v1) so a surprise rewrite of the Action does not break you on a Tuesday. Check those repos when you copy YAML a year from now.
Getting the repo onto GitHub
If your sketches only exist on your PC, nothing in this article can run yet. GitHub needs a copy of the project, and Git (the version-tracking tool GitHub is built around) is how you send it. Create an empty repository on GitHub.com first, then run these in the folder that holds your sketches:
# Start tracking this folder with Git.
git init

# Stage every file, then save a snapshot (a commit) with a short note.
git add .
git commit -m "Add sketches"

# Name the main branch, point at your GitHub repo, and upload.
# Replace the address with the one GitHub shows for your new repository.
git branch -M main
git remote add origin https://github.com/YOURNAME/my-firmware.git
git push -u origin main
Once the push finishes, refresh the repository page and you should see your sketch folders listed.
Repo layout
GitHub needs a Git repo on GitHub.com. Sketch folders at the root or under sketches/ / examples/ are fine. Example:
my-firmware/
  CliBlink/CliBlink.ino
  Dht22Bench/Dht22Bench.ino
  .github/workflows/compile.yml
Do not commit %LOCALAPPDATA%\Arduino15. Cores install on the runner each job (or you cache them later). Do not commit secrets in sketches.
Minimal workflow with compile-sketches
Create .github/workflows/compile.yml:
name: Compile sketches          # The name shown in GitHub's Actions tab

on:                             # When to run this workflow
  push:                         # ...on every push
  pull_request:                 # ...and on every pull request

jobs:
  compile:
    runs-on: ubuntu-latest      # A fresh Linux runner, provided by GitHub
    steps:
      - uses: actions/checkout@v4          # Copy your repo onto the runner

      - uses: arduino/compile-sketches@v1  # Arduino's official compile Action
        with:
          fqbn: arduino:avr:uno            # Board to compile for
          sketch-paths: |                  # Which folders contain sketches
            - CliBlink
            - Dht22Bench
sketch-paths is a YAML list. The Action searches those paths for sketches. Default in the Action's docs is - examples if you omit it. Set it to your folders.
fqbn default in that Action is arduino:avr:uno. Official AVR boards pull the platform automatically from Arduino's default index. ESP32 needs extra platforms and often libraries in the Action inputs. See the compile-sketches README for the platforms / libraries YAML shape.
If the job fails, open the log. The compile error is the same text you would see in a local arduino-cli compile.
Free GitHub accounts get a monthly minutes budget for private repos. A two-minute AVR compile on ubuntu-latest is cheap. An ESP32 core download every run is slower. If jobs get heavy, look at Actions cache for Arduino15 later. Do not start there. Get a green Uno compile first.
setup-arduino-cli, when you want the raw CLI
If you would rather type the same commands you use on Windows:
name: Compile with CLI

on:
  push:
  pull_request:

jobs:
  compile:
    runs-on: ubuntu-latest
    steps:
      - uses: actions/checkout@v4

      - uses: arduino/setup-arduino-cli@v2   # Put arduino-cli on the runner's PATH
        with:
          version: "1.x"                     # Any 1.x release

      - name: Install AVR core               # "run:" lines are ordinary shell commands
        run: |
          arduino-cli core update-index
          arduino-cli core install arduino:avr

      - name: Compile Blink                  # If this fails, the whole job goes red
        run: arduino-cli compile --fqbn arduino:avr:uno ./CliBlink
version: "1.x" tracks CLI 1.x. Pin 1.5.1 if you want exact. ubuntu-latest is Linux. Paths use / not C:\. The CLI commands are otherwise the ones in the commands article in this folder.
A failed compile step fails the job. You do not need $LASTEXITCODE in bash if set -e is on (GitHub's default run: shells stop on error).
Matrix: more than one board
jobs:
  compile:
    runs-on: ubuntu-latest
    strategy:
      fail-fast: false                 # Keep running the other boards even if one fails
      matrix:                          # Run this job once per entry below
        include:
          - fqbn: arduino:avr:uno
          - fqbn: arduino:avr:nano
    steps:
      - uses: actions/checkout@v4
      - uses: arduino/compile-sketches@v1
        with:
          fqbn: ${{ matrix.fqbn }}     # Filled in with each board in turn
          sketch-paths: |
            - CliBlink
fail-fast: false means Nano still runs if Uno already failed. You want both error logs.
Libraries
If Dht22Bench needs Library Manager packages, tell compile-sketches via its libraries input (see that Action's README), or arduino-cli lib install in a run: step before compile. Pin versions when a library's latest tag has broken you before.
YAML gotchas that waste an evening
The workflow file is written in YAML, a settings format where structure comes from indentation. It is forgiving about almost nothing, so a few rules save you from mysterious failures:
- Use spaces, never tabs. A tab character makes GitHub refuse the whole file.
- Keep each level of indentation consistent (two spaces is the usual choice). A step indented one space too far silently becomes part of the previous step.
- A dash starts a list item.
- uses:and- name:each begin a new step. - The
|afterrun:means "everything indented below is one multi-line script."
If GitHub reports a syntax problem before the job even starts, it is almost always one of those four.
Reading a failed run
A red X is useful once you know where to look. Open the Actions tab, click the failed run, then click the job on the left. Each step is a collapsible row, and the one with the red mark is where things broke. Expand it and read from the bottom. For a compile failure you will see the same message you would get locally, such as a missing header or an undeclared variable, along with the file and line number. For an install failure you will see the CLI complaining that it cannot find a core or library, which usually means a typo in a name or a missing platforms entry.
A status badge for your README
Once the workflow is stable, you can show its result at the top of your README so visitors see at a glance whether the code builds. Add this line, replacing the owner and repository names:

The badge turns green or red automatically after each run. It is a small thing, but a visible red badge is excellent motivation to fix a broken build quickly.
What this does not do
- It does not prove the sketch runs. A compile can succeed and the LED still be on the wrong pin.
- It does not talk to Serial.
- It does not replace a human upload on the bench.
- Private libraries that are not in Git need a way onto the runner (another repo, or vendored
libraries/in the sketch). Do not paste tokens into the workflow file. Use GitHub Secrets if you must fetch a private zip.
The day-to-day rhythm
Once the workflow exists, the loop is pleasantly boring. You make a branch for a change, push it, and GitHub compiles the sketches before anyone merges. A branch is a separate line of work, so a half-finished idea cannot disturb the working code on main.
# Create and switch to a new branch for this change.
git switch -c fix-led-pin

# ...edit the sketch, then save the change...
git add .
git commit -m "Move LED to pin 6"

# Upload the branch. GitHub now runs the compile workflow on it, and you
# will see a green check or red X next to the commit within a couple of minutes.
git push -u origin fix-led-pin
Open a pull request from that branch on GitHub.com and the check result appears at the bottom of the page. Green means the change at least compiles, so you can merge with some confidence. Red means you found out before it reached main, which is the entire reason this setup exists.
First-time checklist
- Put sketches in the repo. Push.
- Add
compile.yml. Push again. - GitHub → repo → Actions tab. Watch the job.
- Break a sketch on purpose (typo). Confirm the job goes red. Then fix it. If a broken sketch stays green, the workflow is compiling the wrong path.
Wrap-up
GitHub Actions runs Arduino CLI (or compile-sketches, which wraps it) on every push and pull request. Use arduino/setup-arduino-cli@v2 when you want the raw CLI, or arduino/compile-sketches@v1 when you want Arduino's compile Action. Compile only. Upload stays local. The pipeline article in this folder is how to grow this into artifacts and more than one job.
Hack The World and Make Awesome.




