

REPL stands for Read-Eval-Print Loop. The interpreter reads a line you type, evaluates it on the board, prints the result, and waits again. The prompt is >>>.
This is the reason people install MicroPython to learn a sensor. You do not compile. You type pin.value(1) and the pin changes. Part 7 of the Mastery Series is print debugging in C++. The REPL is live inspection plus live control. It is not a substitute for a main.py you have saved.
You need MicroPython firmware and Arduino Lab for MicroPython connected (install and first-program articles in this folder).
Open the REPL
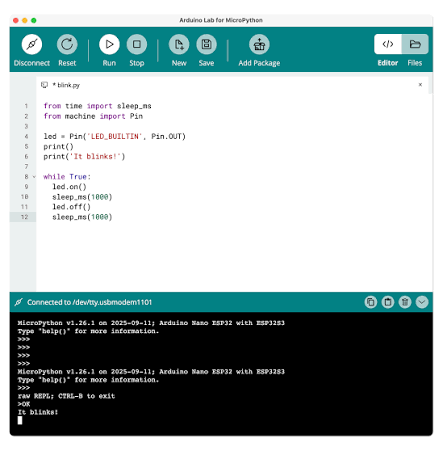
Connect in the Lab. Expand the terminal if it is collapsed. You should see >>>. If you see a running script's prints and no prompt, Stop the script (keyboard interrupt). Then you get the prompt back.
Type:
>>> 2 + 2            # An expression...
4                    # ...prints its value
>>> name = "bench"   # An assignment prints nothing
>>> name             # Type the name to see what it holds
'bench'
Expressions print their value. Assignments do not print unless you type the name again.
Tab completes names when the Lab's REPL supports it. Use it after import machine so you do not guess Pin vs pin.
Why a live prompt beats compile and upload
In the Arduino C++ workflow, every experiment is a loop: edit, compile, upload, wait, watch. Even on a fast machine that is ten or twenty seconds per idea. At the REPL the loop is one line and a keypress, so you can try forty ideas in the time one upload takes. That speed changes how you learn. You stop guessing what a function will do and simply ask the board.
Talk to a pin
>>> from machine import Pin   # Load the pin-control class
>>> led = Pin(48, Pin.OUT)    # Nano ESP32 onboard LED; use your board's LED GPIO
>>> led.value(1)              # LED on, instantly
>>> led.value(0)              # LED off
Change 48 to your board's LED GPIO (2 on many generic ESP32 DevKits). If nothing happens, wrong pin, not a broken REPL.
Read a pin (button to GND, with a pull-up if the chip has one):
>>> btn = Pin(9, Pin.IN, Pin.PULL_UP)  # Input, with the chip's internal pull-up resistor on
>>> btn.value()                       # 1 = not pressed (pulled up), 0 = pressed (shorted to GND)
1 or 0 depending on wiring. (A pull-up is a resistor that gently holds the pin at 3.3 V when nothing else is driving it, so an unpressed button reads a steady 1 instead of random noise.) Mash the button and run btn.value() again. That is a sensor test without a file.
Ask the board questions
Before you wire anything, the REPL can tell you a lot about the chip you are holding. These are all safe, read-only lookups, so poke around freely:
>>> import os, gc, sys
>>> os.listdir()           # Files stored on the board (boot.py, main.py, ...)
>>> gc.mem_free()          # Bytes of RAM still available to your program
>>> sys.implementation     # Which MicroPython build and version is running
>>> from machine import ADC, Pin
>>> pot = ADC(Pin(1))      # ADC = analog-to-digital converter, it turns a voltage into a number
>>> pot.read_u16()         # 0 to 65535, proportional to the voltage on that pin
gc is the garbage collector, the part of MicroPython that frees memory your program no longer uses. Checking gc.mem_free() before and after loading a big library tells you what that library really costs, which is a number you will care about on a small chip. As before, change Pin(1) to a real analog-capable pin on your board.
Reading an error without panic
You will mistype things, and the REPL will answer with a traceback. It looks alarming and is actually friendly, because it names the exact problem:
>>> led.valu(1)
Traceback (most recent call last):
  File "<stdin>", line 1, in <module>
AttributeError: 'Pin' object has no attribute 'valu'
Read it from the bottom. The last line is the diagnosis: a Pin has no attribute called valu, so there is a typo. A NameError means you used a name you never created (often a forgotten import). A ValueError means the name exists but you handed it something it cannot accept, such as a GPIO number the chip does not have. Once you can name the error type, most fixes are obvious.
One small trick for loops: typing for at the prompt starts a block, and the REPL shows ... while it waits for more lines. Indent the body, then press Enter on a blank line to run it. For anything longer than three lines, I would still rather use the editor.
Paste mode
A multi-line while or def pasted into the REPL can run too early, before the block is finished. Paste mode tells the interpreter to wait until the whole paste is in. Arduino Lab exposes paste mode as a REPL feature. For a first afternoon, prefer Run in the editor for multi-line code, and use the REPL for one-liners. When you do paste a block, use paste mode, then Enter as the Lab documents.
Stop and soft reset
Stop (keyboard interrupt) breaks a running while True. You get a traceback (Python's error report, showing which line was running when it stopped) and >>> back.
Soft reset restarts the interpreter without power-cycling USB. boot.py and main.py run again. Use it after you upload a new main.py, or when imports look stale.
A hard unplug also resets. Soft reset is faster and keeps the serial session.
REPL is not main.py
Anything you only typed at >>> is gone after reset unless you put it in a file. People "lose" a working sensor sequence because it lived in scrollback.
When a REPL session works, copy the lines into the editor, Run, then upload as main.py. I think of the REPL as my scratch pad for figuring things out, and main.py as the finished program the board runs on its own.
Do not debug a 200-line main.py only by retyping pieces in the REPL and never saving. You will not reconstruct it.
The Lab owns the serial port
IDE 2 Serial Monitor cannot share the port with the Lab. Close Monitor. Close a second Lab window. mpremote and other serial tools the same. If the REPL is frozen, Stop first, then disconnect/connect, then reset.
Online Lab (Cloud) is the same prompt over the browser's connection. Permissions and Create Agent / USB on that computer still apply.
help(), dir(), and help(Pin) in the REPL print what this firmware contains. Ports differ. Trust help on the connected board more than a snippet written for a Pico.
Ctrl+C in some serial terminals is the same as Stop. In the Lab, use the Stop control if Ctrl+C is captured by the editor. If you paste a while True without sleep, Stop is how you get the prompt back. Do not unplug as the first reaction.
Keep a snippet notebook
The REPL forgets everything, so build a habit of pasting the lines that worked into a plain text file called something like pin-notes.txt. Over a few weeks it becomes a personal cheat sheet of exact pin numbers, sensor read calls, and the little tricks that took you an hour to discover. When a project starts, you copy from your own notes instead of searching the web again, and the lines are already proven on your board rather than on somebody else's.
Write a short comment beside each snippet saying why it works, not just what it does. A note that says "pull-up on pin 9, button wired to ground" will make sense in six months. A bare Pin(9, Pin.IN, Pin.PULL_UP) will not.
Troubleshooting
| Symptom | Likely cause | Fix |
|---|---|---|
No >>> |
Script running, or not connected | Stop. Connect. Reset |
IndentationError on paste |
Pasted a block without paste mode | Paste mode, or Run from editor |
| Pin commands do nothing | Wrong GPIO | Board's MicroPython pinout |
| Lost work after reset | Never saved to main.py |
File manager upload |
| Garbage / no connect | Port busy or still C++ firmware | Close other apps. Reinstall MicroPython if needed |
Wrap-up
The REPL is a live Python prompt on the chip. Use it to poke pins and sensors. Use Stop and soft reset when a loop eats the prompt. Copy anything that worked into main.py. Next: LEDs, sensors, I2C, SPI, and UART in MicroPython.
Hack The World and Make Awesome.




