

If you've spent any time in the Arduino world, you've probably noticed that it's not just one board. It's an entire ecosystem with dozens of options. And if you've ever stared at an online cart with an Uno, a Mega, a Nano 33 IoT, and a Portenta H7 all open in different tabs wondering which one to buy, you're not alone. That confusion is almost a rite of passage.
The good news: there's a clear, logical way to think about board selection, and once it clicks, it clicks permanently. You'll stop picking boards by instinct and start picking them by design. That's what this article is about.
This part covers every major Arduino board family, compares their specs side by side, explains how to read a pinout, how to power your projects safely, and how to match a board to a project before you spend a dollar. By the end, you'll have a reliable decision framework you can apply to any build.
Arduino Board Families Overview
Arduino's lineup has expanded considerably since the original Uno shipped in 2010. Today there are boards for absolute beginners, boards for battery-powered IoT deployments in the field, and boards powerful enough to run machine learning inference on the edge. They're organized into families that share common hardware architectures, form factors, and target use cases.
Understanding the families first makes individual board choices much easier. You're not choosing between 20 random options. You're first choosing a family, then choosing a board within it.
Uno Series
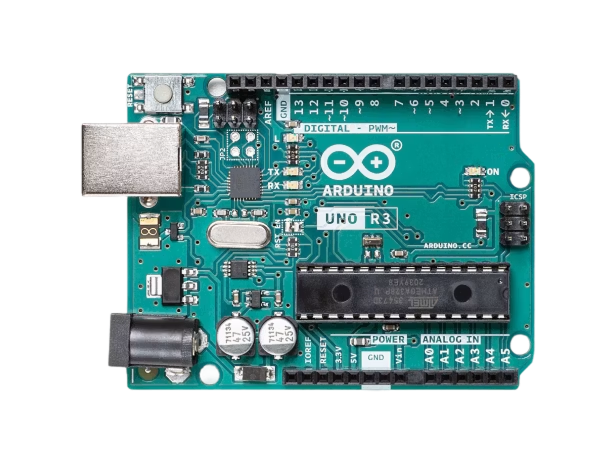
Photo: Arduino, CC BY-SA 4.0
The flagship beginner family and the most widely documented board line in the Arduino ecosystem. The classic Uno uses the 8-bit ATmega328P running at 16 MHz with 5V logic, and it has been the default target for tutorials, shields, and library support since 2010. The Uno R4 (released 2023) modernizes the form factor with a 32-bit Renesas ARM processor while keeping the same physical pin layout and 5V logic, making it a drop-in upgrade for almost any existing Uno project.
If you're choosing a board for learning, teaching, or general prototyping and you don't have a specific reason to pick something else, start here.
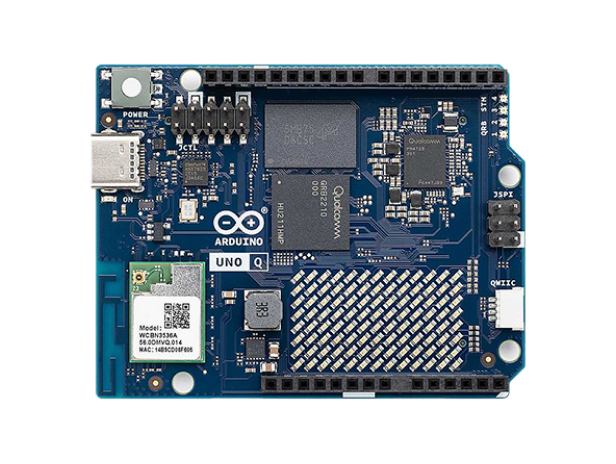
Photo: Arduino, CC BY-SA 4.0
The newest member of the family breaks the pattern entirely. The Uno Q pairs a Qualcomm Dragonwing quad-core processor running full Debian Linux with an STM32U585 microcontroller for real-time I/O, in the same Uno footprint and shield-compatible pin layout. It's a genuinely different kind of board: Python and AI model deployment run on the Linux side while the microcontroller side handles sensors and timing, and the two talk to each other over the board itself. If you're just starting out, this still isn't your first board, the classic Uno R3 or R4 Minima is the right call for that. But if a project needs real Linux computing and hard real-time control in one small package, the Uno Q is worth knowing about.
- Arduino Uno R3
- Arduino Uno R4 Minima
- Arduino Uno R4 WiFi
- Arduino Uno Q (hybrid Linux + real-time MCU)
Nano Series
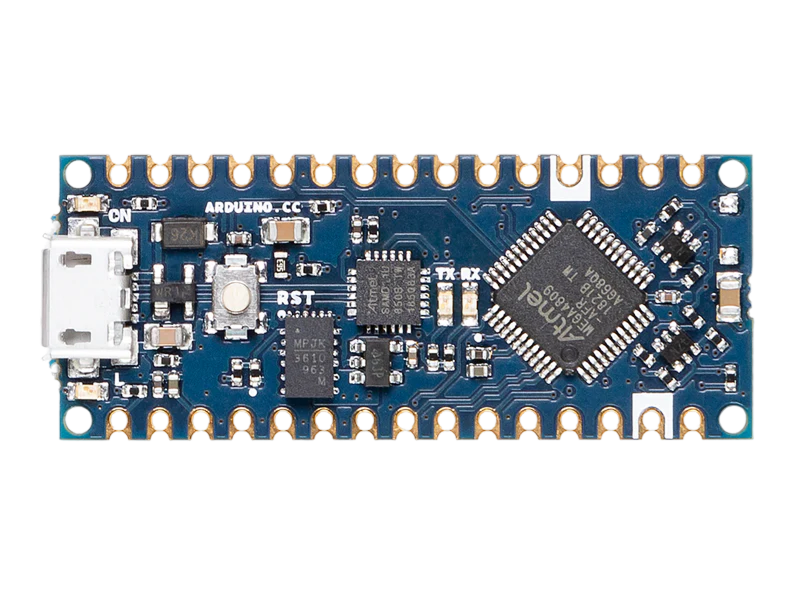
Photo: Arduino, CC BY-SA 4.0
The Nano family shares the same core functionality as the Uno family but in a compact, breadboard-friendly form factor. The original Nano uses the same ATmega328P as the Uno: same code, same libraries, smaller footprint. A common workflow is to prototype on a full-size Uno, then drop a Nano into the final build to save space and cost.
The modern Nano variants go considerably further. The Nano Every steps up to the newer ATmega4809. The Nano 33 IoT and Nano RP2040 Connect bring wireless connectivity, more memory, and 3.3V logic in the same breadboard-friendly package. The RP2040 Connect specifically adds PIO (Programmable I/O), a feature that lets you implement custom communication protocols directly in hardware instead of loading down the main processor. The Nano ESP32 pairs an Espressif ESP32-S3 processor with the familiar Nano form factor, bringing WiFi, Bluetooth, and significantly more processing power at 3.3V logic. These are not interchangeable with the classic Nano from a voltage or code standpoint. Check your variant carefully before buying, especially from third-party sellers.
Two more recent additions round out the family. The Nano 33 BLE Sense Rev2 pairs the plain Nano 33 BLE's Bluetooth radio with a full onboard sensor suite (9-axis motion, microphone, gesture and light, barometric pressure, temperature and humidity), built for TinyML projects that need to sense the world, not just connect to it. The Nano Matter is the newest release, built around Silicon Labs' MGM240S radio for Thread and Matter, the smart-home standard that lets a device work natively with Apple Home, Google Home, and Amazon Alexa without a separate hub. It's the board to reach for if a project needs to join an existing smart home rather than run its own app.
- Arduino Nano (classic, 5V AVR)
- Arduino Nano Every
- Arduino Nano 33 IoT
- Arduino Nano 33 BLE
- Arduino Nano 33 BLE Sense Rev2
- Arduino Nano RP2040 Connect
- Arduino Nano ESP32
- Arduino Nano Matter
Mega Series
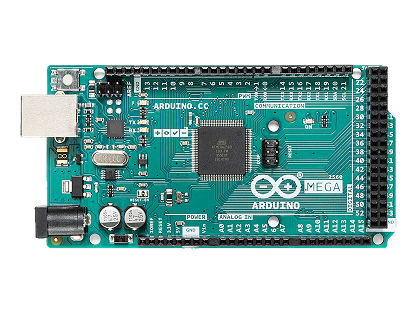
Photo: Arduino, CC BY-SA 4.0
When the Uno runs out of pins or memory, the Mega is the natural next step within the classic AVR family. The Mega 2560 gives you 54 digital I/O pins (15 with PWM), 16 analog inputs, four hardware UARTs, 256 KB of flash, and 8 KB of SRAM. It's the workhorse board for projects that need to control a lot of things simultaneously: 3D printers, CNC controllers, large LED matrix systems, and robotics platforms regularly use the Mega specifically because nothing else in the classic lineup provides this level of I/O.
- Arduino Mega 2560
- Arduino Mega ADK
Due Series
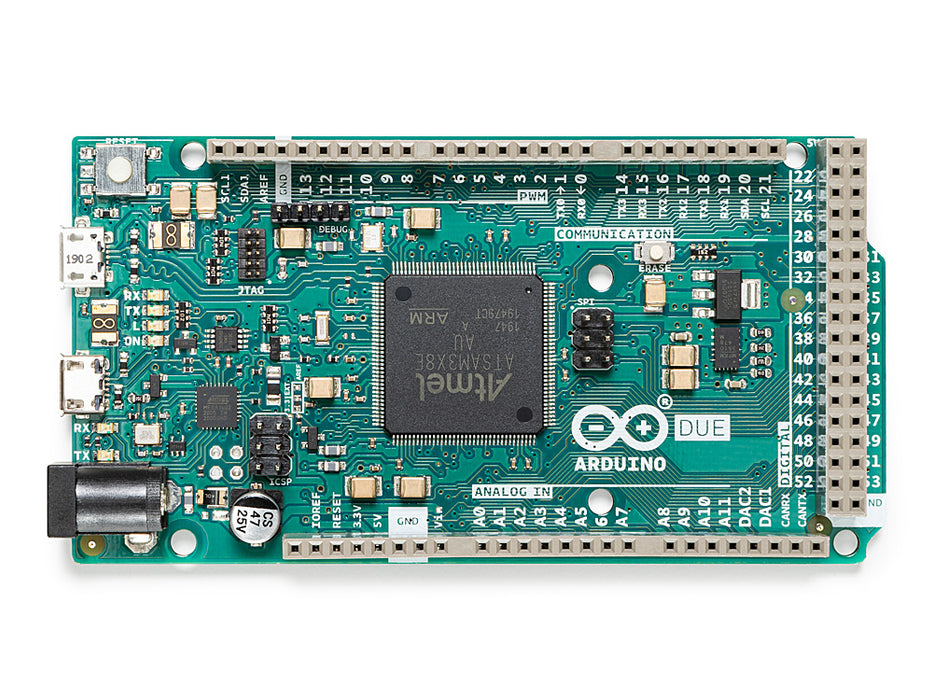
Photo: Arduino, CC BY-SA 4.0
The Due was Arduino's first 32-bit board and still holds a unique position in the lineup. Its ARM Cortex-M3 running at 84 MHz brings real computational muscle, but more importantly it includes two 12-bit DAC outputs, meaning it can generate true analog voltages rather than just simulating them with PWM. This makes the Due the right choice for audio generation, precision waveform output, and signal processing applications the AVR boards simply can't handle.
Critical note: the Due runs at 3.3V logic, not 5V. Connecting a 5V signal to a Due I/O pin can permanently damage the board. This catches people who are used to the Uno regularly.
- Arduino Due
Leonardo and Micro
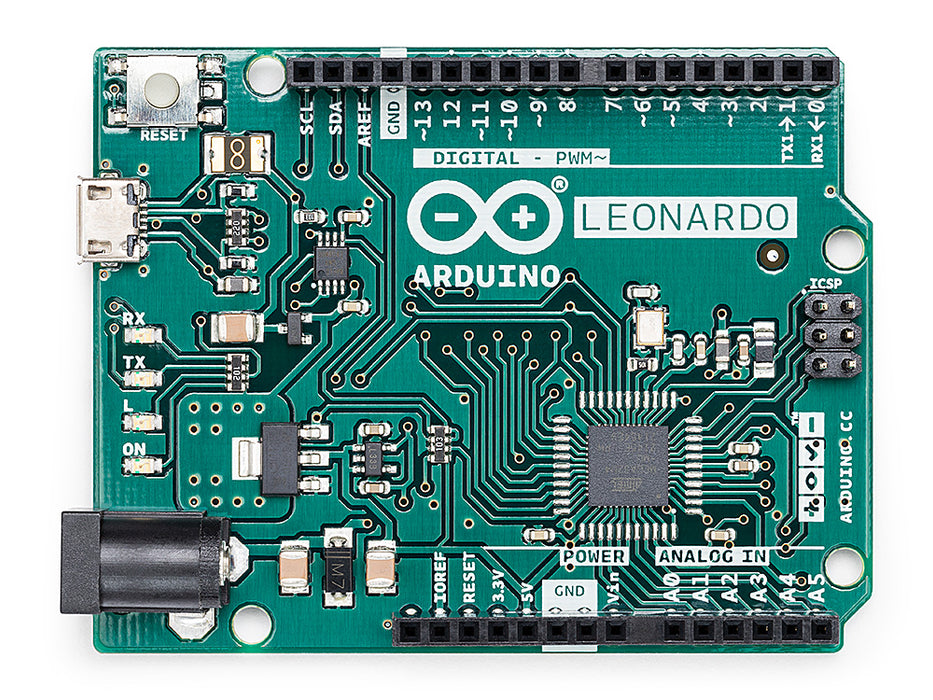
Photo: Arduino, CC BY-SA 4.0
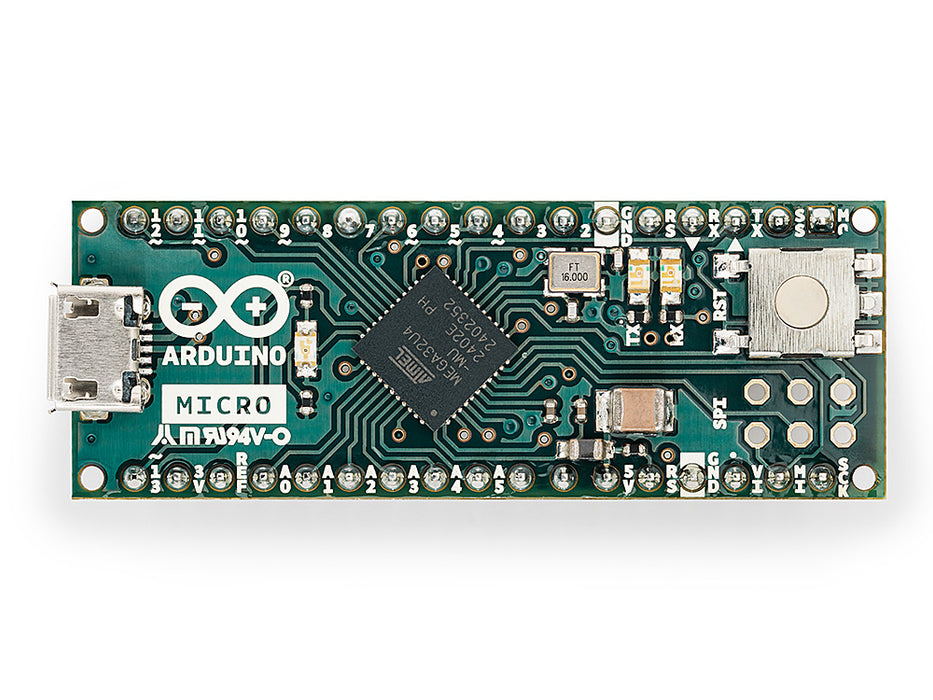
Photo: Arduino, CC BY-SA 4.0
Both of these boards are built around the ATmega32u4, which has native USB hardware built directly into the microcontroller. Unlike the Uno, which uses a separate USB-to-serial chip for computer communication, the Leonardo and Micro can appear to a connected computer as a USB keyboard, mouse, gamepad, or MIDI controller, with no special drivers required on any major OS. This native USB HID capability makes them the right choice for custom input devices, accessibility tools, and automation rigs that need to simulate human keyboard and mouse input.
- Arduino Leonardo
- Arduino Micro
- Arduino Esplora
MKR Series
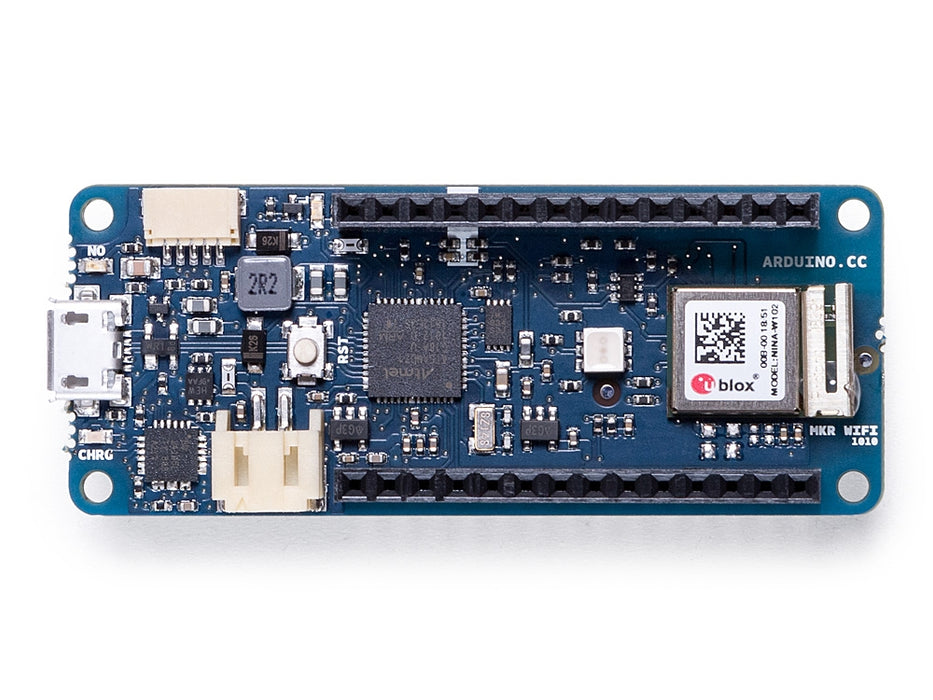
Photo: Arduino, CC BY-SA 4.0
The MKR family is built for IoT applications where power efficiency, compact size, and wireless connectivity are priorities. All MKR boards share a common compact form factor with a JST Li-Po connector for battery power and onboard charging circuitry. They use the SAMD21 ARM Cortex-M0+ running at 48 MHz with 3.3V logic, and each board in the family offers a different wireless radio: WiFi, cellular GSM, NB-IoT, or LoRaWAN. Many also include a hardware crypto chip (ECC508 or similar) for secure key storage and authentication in production deployments.
- Arduino MKR Zero
- Arduino MKR WiFi 1010
- Arduino MKR GSM 1400 (appears to be discontinued)
- Arduino MKR NB 1500
- Arduino MKR WAN 1310
- Arduino MKR1000
GIGA Series
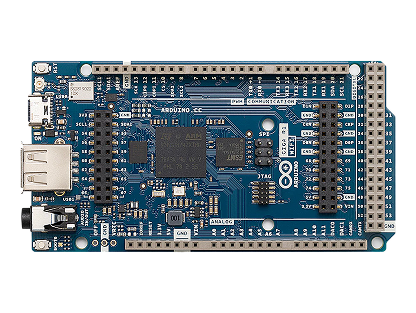
Photo: Arduino, CC BY-SA 4.0
The GIGA R1 WiFi stands on its own rather than belonging to a family of variants: it is currently the most powerful consumer board Arduino makes. It uses a dual-core STM32H747 (Cortex-M7 at 480 MHz plus Cortex-M4 at 240 MHz) with 76 I/O pins, onboard WiFi and Bluetooth, an HDMI output, a USB-C port with Host OTG support for plugging in USB devices, and an audio jack. Both cores can run simultaneously, and it supports both Arduino C++ and MicroPython.
Reach for the GIGA when a project needs more than the Mega's pin count and more than the Due's processing power at the same time: high-fidelity audio processing, machine learning inference, large robotic platforms, and interactive installations with a display attached.
- Arduino GIGA R1 WiFi
Portenta Family
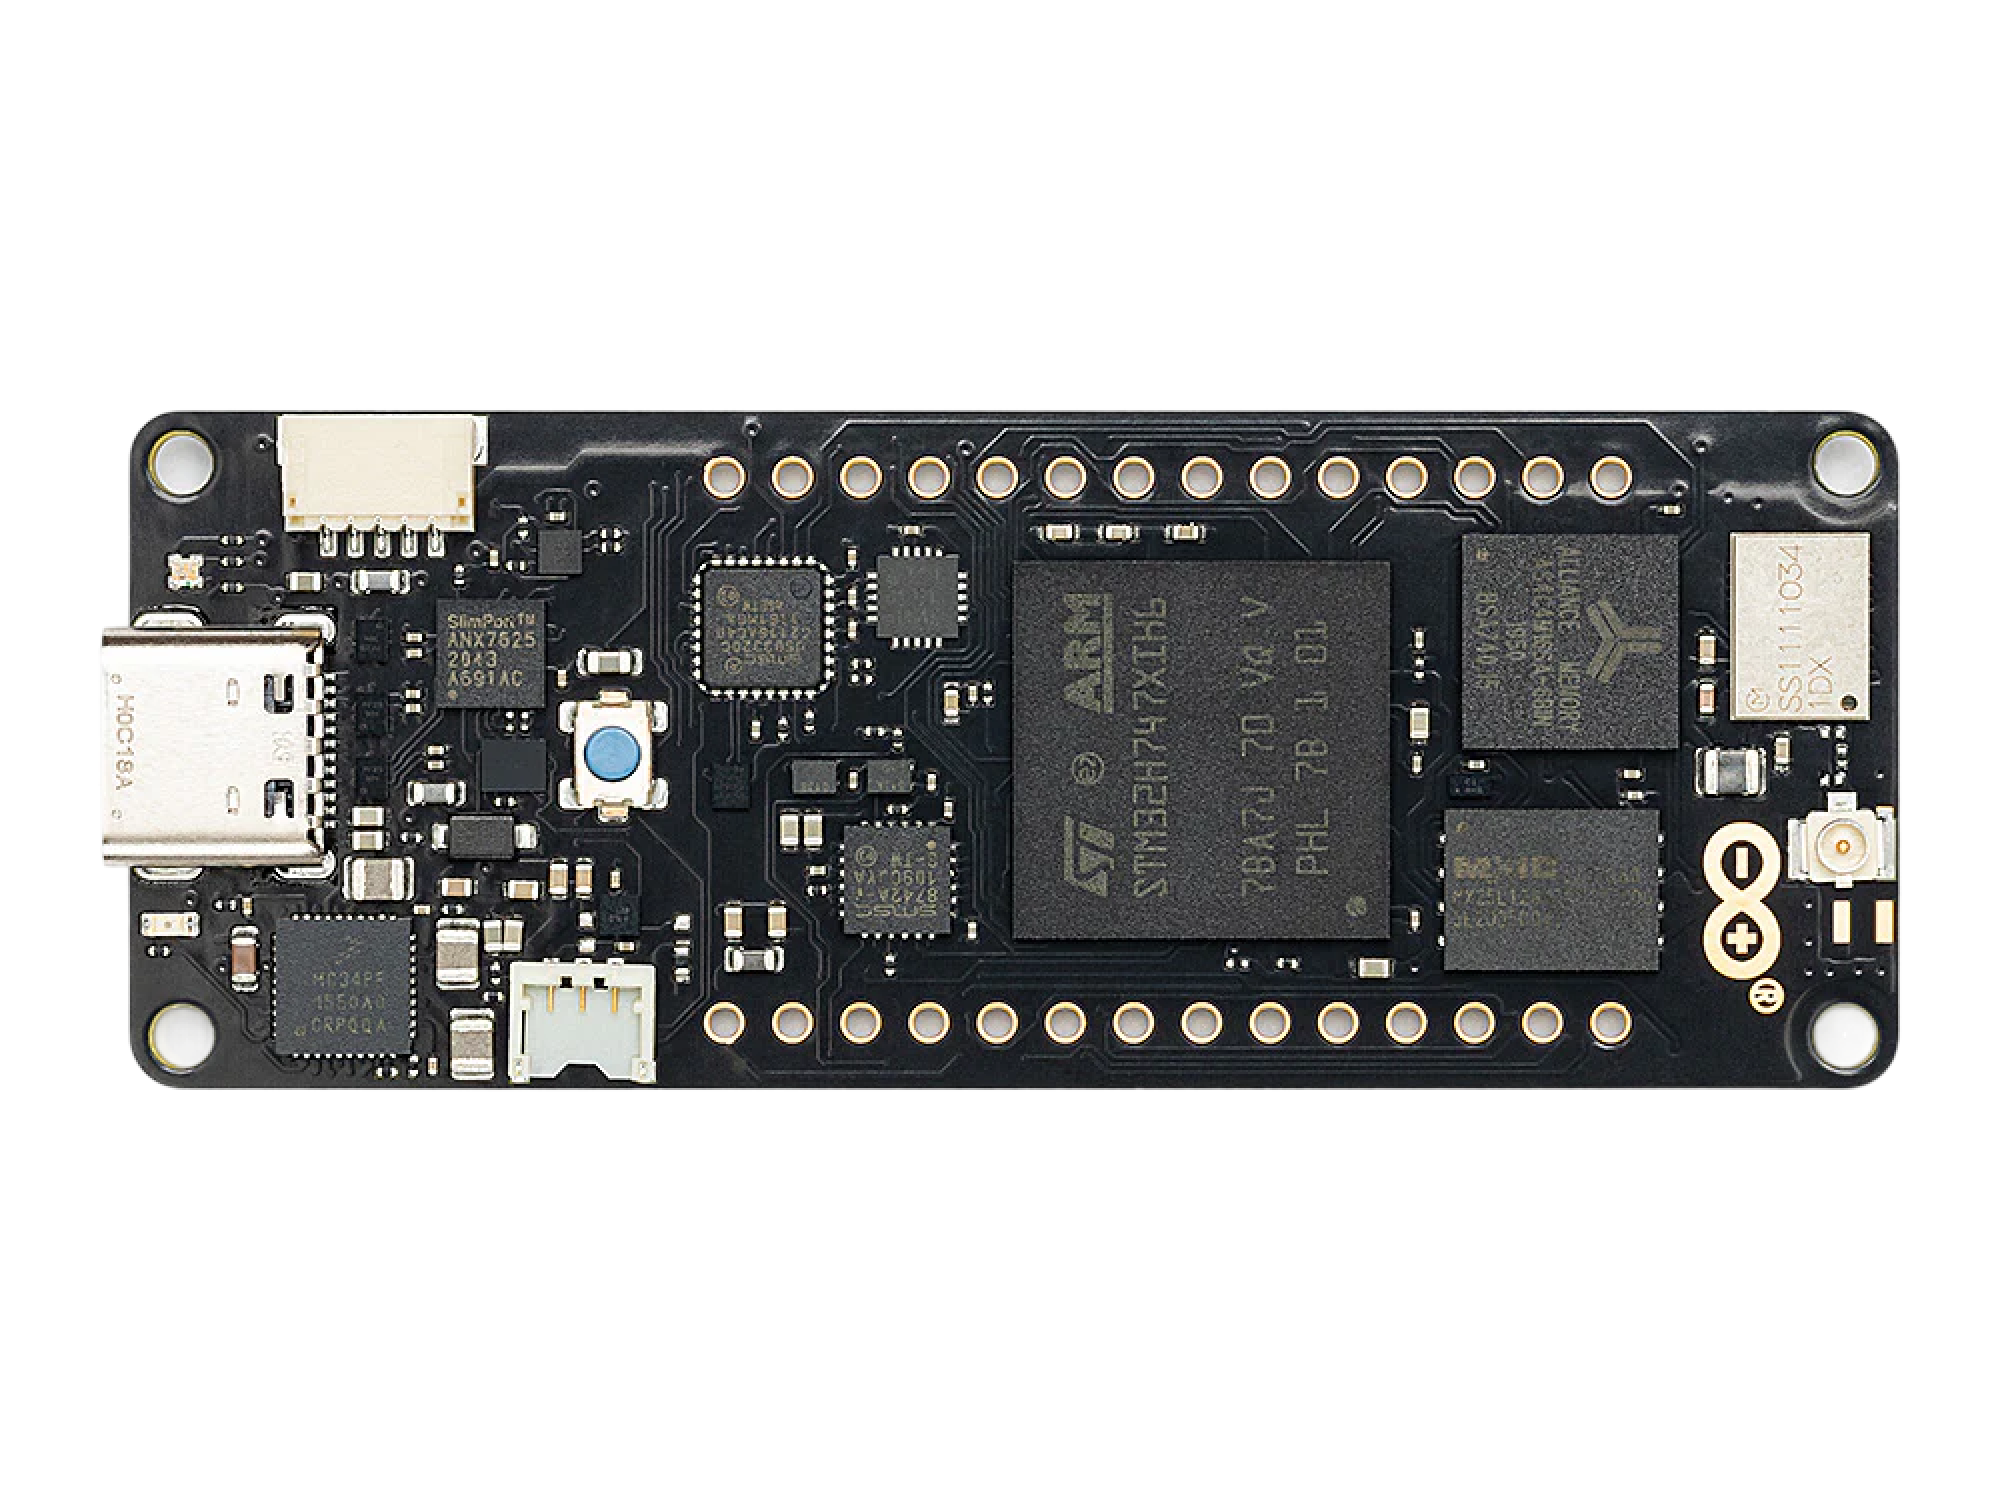
Photo: Arduino, CC BY-SA 4.0
The Portenta line is Arduino's industrial and professional tier, designed for demanding environments and production deployments. The Portenta H7 uses a dual-core STM32H747 (Cortex-M7 at 480 MHz + Cortex-M4 at 240 MHz) in a compact, high-density form factor designed for industrial enclosures and custom carrier boards. It supports Mbed OS, Python, JavaScript, and Arduino C++, and both cores can run simultaneously. The Portenta X8 takes things further by running a full Linux distribution alongside the real-time M4 core, making it suitable for edge computing applications that need both a Linux software stack and real-time hardware control at the same time. The Portenta C33 offers a more accessible entry point to the family with a Renesas RA6M5 processor focused on secure IoT connectivity.
- Arduino Portenta H7
- Arduino Portenta X8
- Arduino Portenta C33
Nicla Series
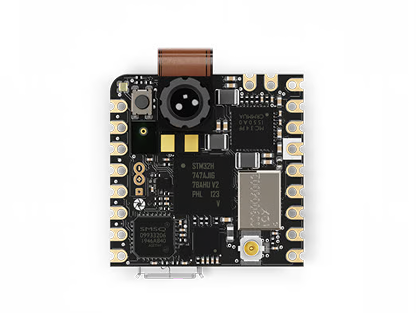
Photo: Arduino, CC BY-SA 4.0
The Nicla boards are ultra-compact, sensor-rich boards built for wearable, environmental, and edge AI applications. They're not general-purpose development boards. They're purpose-built for specific sensing tasks. The Nicla Vision includes an STM32H7, an onboard camera, IMU, microphone, and neural network acceleration in a thumb-sized package. The Nicla Sense ME sits between the Vision and the Env board: a compact motion-and-environment sensor board built around four Bosch Sensortec sensors (motion, magnetometer, pressure, and a combined gas/pressure/humidity/temperature sensor), aimed at wearables and condition-monitoring projects that need sensor fusion without a camera. The Nicla Sense Env focuses purely on environmental monitoring with an array of onboard sensors for temperature, humidity, pressure, and air quality. These boards target product development and deployment scenarios more than hobbyist prototyping.
- Arduino Nicla Vision
- Arduino Nicla Voice
- Arduino Nicla Sense ME
- Arduino Nicla Sense Env
Opta Series
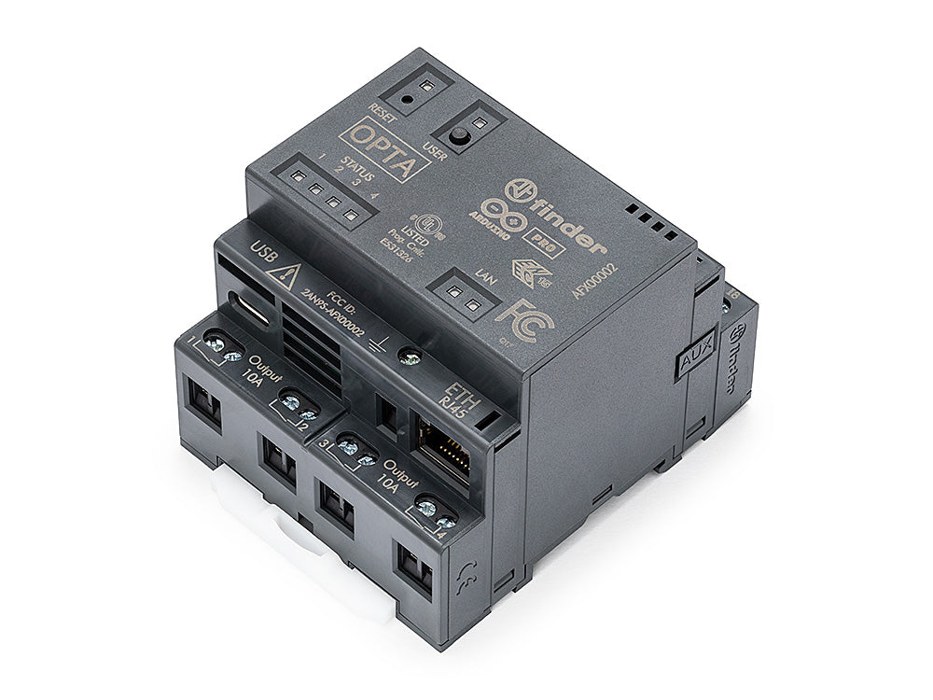
Photo: Arduino
Every board so far lives on a desk, a breadboard, or inside a hobby project. The Opta lives in a metal electrical cabinet bolted to the wall of a factory, a pump house, or a building's mechanical room. It's Arduino's micro PLC, built together with the electrical components company Finder. PLC stands for programmable logic controller: a small, tough computer that watches inputs (a float switch, a temperature probe, a push button) and switches outputs (a pump, a motor, a heater) according to rules you program. Industrial sites have relied on PLCs for decades because they're built to run unattended for years, and the Opta is Arduino's way of bringing that world into the Arduino ecosystem.
Under the housing is the same dual-core STM32H747XI processor you'll find in the Portenta H7 and GIGA R1 WiFi (a Cortex-M7 running at up to 480 MHz alongside a Cortex-M4 at up to 240 MHz). What makes it a PLC instead of a development board is everything wrapped around that chip. It has eight inputs you can set up as plain on/off digital inputs or as analog inputs that read 0 to 10 volts, and four relays on the output side. A relay is an electrically operated switch: a tiny signal from the processor clicks a physical contact closed, which lets a delicate board control a load that would destroy it if connected directly. These relays are rated for 250 V AC at 10 A each. The Opta runs on 12 to 24 V DC and clips onto a DIN rail (the standard metal mounting rail inside electrical cabinets). You can program it with ordinary Arduino sketches, or with the standard PLC languages defined by IEC 61131-3, such as ladder logic, a diagram style that looks like the rungs of a ladder and is what most industrial electricians already know.
The base unit comes in three versions, and the difference is connectivity. The Opta Lite has Ethernet and USB-C. The Opta RS485 adds an RS485 serial port, the wiring standard industrial equipment uses to talk over long cable runs, commonly carrying a protocol called Modbus (a decades-old language machines use to read and write each other's values). The Opta WiFi has all of that and adds WiFi and Bluetooth Low Energy. If you need more inputs and outputs later, the Pro Opta Ext expansion modules snap onto the side of the base unit, and you can chain up to five. The D1608E adds 16 inputs and 8 electromechanical relays, the D1608S swaps those relays for 8 solid-state ones (which switch with electronics instead of a moving contact), and the A0602 handles analog work, with inputs and outputs for 0 to 10 V and 4 to 20 mA signals, plus support for temperature probes called RTDs.
One word of caution before you get excited. Those relays can switch mains-voltage loads, and that is a different league of danger from a 5V sketch on a breadboard. Don't wire anything to mains voltage unless you know how to do it safely, or have a qualified person do it for you. You can learn the Opta perfectly well using low-voltage loads, and this is not the board I'd pick for a first project. The Uno R3 still holds that job.
- Arduino Opta Lite
- Arduino Opta RS485
- Arduino Opta WiFi
- Arduino Pro Opta Ext D1608E, D1608S, and A0602 (expansion modules)
Pro Mini and Fio
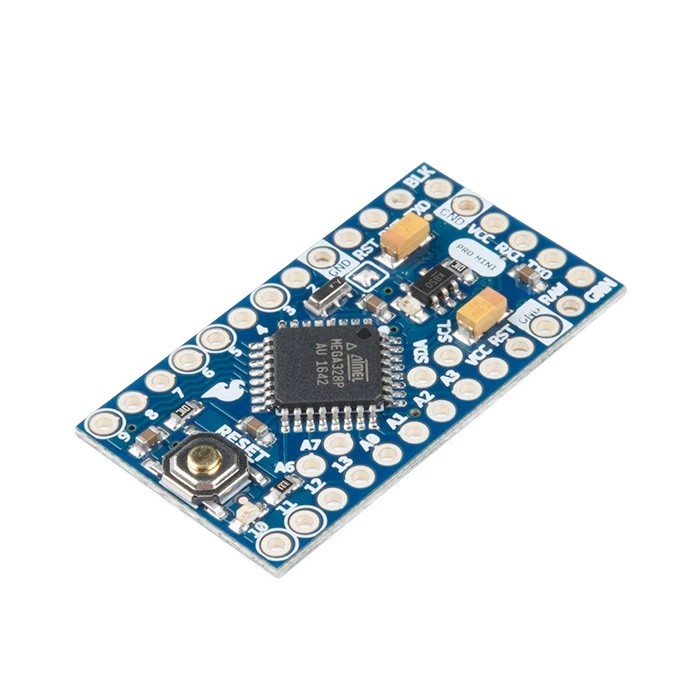
Photo: SparkFun Electronics
These two boards solve a different problem from everything above. Once a project works on a breadboard with an Uno, you often want a smaller, cheaper board you can leave inside the finished thing. The Pro Mini is that idea taken as far as it goes. It carries the same ATmega328P chip as the Uno with almost everything else stripped away. There's no USB port and no barrel jack, and the board is only a little larger than a postage stamp.
No USB port means your computer can't talk to the board directly. You upload sketches through a small adapter called a USB-to-serial adapter (often sold under the name FTDI, after the company behind the most popular chip for the job), which plugs into a six-pin header on the edge of the board. If you've never used one, buy the adapter at the same time as the board, because the Pro Mini won't do anything useful without it. The board comes in two versions that are not interchangeable: a 5V version running at 16 MHz and a 3.3V version running at 8 MHz. Both have 32 KB of flash, 2 KB of SRAM, 14 digital pins (6 with PWM), and 8 analog inputs (A6 and A7 can only read analog signals, they can't act as digital pins). One gotcha worth knowing early: if you power the board from something unregulated, like a battery pack, connect it to the pin labeled RAW and not VCC. RAW goes through the onboard voltage regulator, and VCC skips it.
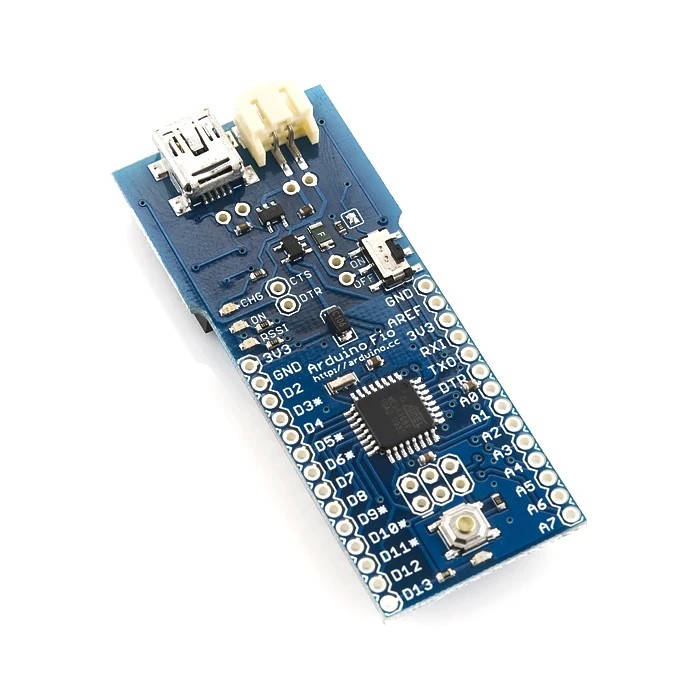
Photo: SparkFun Electronics
The Arduino Fio is a cousin built for wireless, battery-powered projects. It's an ATmega328P running at 3.3V and 8 MHz, with two things the Pro Mini lacks: a socket on the underside for an XBee module (a small radio module that lets boards talk to each other over a wireless link, without WiFi or a router) and a built-in charger for a lithium polymer (LiPo) battery. The mini USB port on the Fio only charges the battery. You still upload sketches through an FTDI adapter, and because the XBee socket and the FTDI header share the same serial pins, the XBee can get in the way during an upload, so take it out first if you run into trouble. Both of these boards are older designs. SparkFun and clone makers still sell them, but they aren't what Arduino itself is pushing these days, so check availability before building a project around one (the Fio especially).
- Arduino Pro Mini 5V (16 MHz)
- Arduino Pro Mini 3.3V (8 MHz)
- Arduino Fio
Side-by-Side Comparison Table
With so many boards available, seeing them compared across key specs in one place makes a significant difference when you're trying to narrow down options. The table below covers the most commonly used and recommended boards across the full lineup. Use it to quickly filter by voltage, connectivity, memory, or I/O count based on what your project actually needs.
A few things to keep in mind when reading the table:
- Flash/RAM: Flash stores your sketch. RAM is working memory your code uses at runtime. Running out of RAM causes crashes and bizarre behavior at runtime; running out of Flash means your sketch won't compile. Both matter.
- I/O Voltage: This is the logic level of the board's GPIO pins. A 3.3V board connected to a 5V sensor without level shifting can be damaged. This is one of the most common causes of mysteriously dead boards and sensors.
- Connectivity: "None" means no onboard wireless. These boards require external modules (ESP8266, nRF24L01, HC-05, etc.) for wireless communication.
| Board | MCU | Flash / RAM | GPIO | USB | I/O Voltage | Connectivity | Ideal Use Case | Datasheet |
|---|---|---|---|---|---|---|---|---|
| UNO SERIES | ||||||||
| Uno R3 | ATmega328P | 32 KB / 2 KB | 20 | USB-B | 5V | None | Learning, prototyping, general use. Best community support in the lineup. | Datasheet |
| Uno R4 Minima | Renesas RA4M1 (Cortex-M4) | 256 KB / 32 KB | 20 | USB-C | 5V | None | Drop-in Uno upgrade. More memory, 32-bit, same shields and pinout. | Datasheet |
| Uno R4 WiFi | RA4M1 + ESP32-S3 | 256 KB / 32 KB | 20+ | USB-C | 5V | WiFi, Bluetooth | IoT-enabled Uno. Onboard 12x8 LED matrix. Backward compatible with Uno shields. | Datasheet |
| Uno Q | Qualcomm QRB2210 (quad-core Cortex-A53) + STM32U585 (Cortex-M33) | 2 MB / 786 KB (MCU) + 2-4 GB RAM / 16 GB eMMC (Linux) | 20 | USB-C | 5V ⚠ | WiFi, Bluetooth | Hybrid Linux + real-time control. Debian Linux and Python alongside a real-time MCU, in a shield-compatible Uno footprint. | Datasheet |
| NANO SERIES | ||||||||
| Nano | ATmega328P | 32 KB / 2 KB | 22 | Mini USB | 5V | None | Compact and permanent installs. Breadboard-native. Same code as Uno. | Datasheet |
| Nano Every | ATmega4809 | 48 KB / 6 KB | 20 | Micro USB | 5V | None | Cost-effective Uno/Nano alternative with more memory and a newer AVR core. | Datasheet |
| Nano 33 IoT | SAMD21 + u-blox NINA-W102 | 256 KB / 32 KB | 22 | Micro USB | 3.3V ⚠ | WiFi, Bluetooth | Small connected IoT builds. Note: 3.3V logic, not 5V tolerant. | Datasheet |
| Nano RP2040 Connect | RP2040 + u-blox NINA-W102 | 16 MB ext. QSPI Flash / 264 KB SRAM | 20 | Micro USB | 3.3V ⚠ | WiFi, Bluetooth | AI/ML, sensor fusion, compact IoT. Dual-core RP2040 with PIO capability. | Datasheet |
| Nano 33 BLE Sense Rev2 | nRF52840 (Cortex-M4) | 1 MB / 256 KB | 22 | Micro USB | 3.3V ⚠ | Bluetooth | TinyML with a full onboard sensor suite: 9-axis motion, mic, gesture/light, pressure, temp/humidity. | Datasheet |
| Nano Matter | MGM240S (Cortex-M33) | 1.5 MB / 256 KB | 22 | Micro USB | 3.3V ⚠ | Thread, Matter, Bluetooth LE | Smart-home projects that join Matter/Thread networks directly, no separate hub required. | Datasheet |
| MEGA SERIES | ||||||||
| Mega 2560 | ATmega2560 | 256 KB / 8 KB | 70 | USB-B | 5V | None | Robotics, 3D printing (Marlin), multi-device systems. High I/O and 4 hardware UARTs. | Datasheet |
| DUE SERIES | ||||||||
| Due | SAM3X8E (Cortex-M3) | 512 KB / 96 KB | 54 | Micro USB x2 ⚠ | 3.3V ⚠ | None | Signal processing, audio, true analog DAC output. NOT 5V tolerant on any I/O pin. | Datasheet |
| LEONARDO / MICRO | ||||||||
| Leonardo | ATmega32u4 | 32 KB / 2.5 KB | 20 | Micro USB | 5V | USB HID (native) | Custom keyboards, mice, MIDI controllers, USB HID devices. No driver required. | Datasheet |
| MKR SERIES | ||||||||
| MKR WiFi 1010 | SAMD21 + u-blox NINA-W102 ⚠ | 256 KB / 32 KB | 22 | Micro USB | 3.3V ⚠ | WiFi, Bluetooth | Battery-powered IoT. Li-Po connector onboard. Note: WiFi module is u-blox NINA-W102 (ESP32-based), not a bare ESP32. | Datasheet |
| MKR GSM 1400 | SAMD21 + u-blox SARA-U201 | 256 KB / 32 KB | 22 | Micro USB | 3.3V ⚠ | GSM/3G Cellular | Remote IoT, telemetry, mobile deployments without WiFi infrastructure. | Datasheet |
| MKR NB 1500 | SAMD21 + u-blox SARA-R410M | 256 KB / 32 KB | 22 | Micro USB | 3.3V ⚠ | NB-IoT / LTE-M | Long-range, low-power field IoT. Agriculture, infrastructure monitoring. | Datasheet |
| MKR WAN 1310 | SAMD21 + Murata CMWX1ZZABZ | 256 KB / 32 KB + 2 MB ext. | 22 | Micro USB | 3.3V ⚠ | LoRaWAN | Long-range, low-power sensor networks using LoRaWAN infrastructure. | Datasheet |
| PORTENTA FAMILY | ||||||||
| Portenta H7 | STM32H747 (Cortex-M7 + M4) | 2 MB int. SRAM + 8 MB ext. SDRAM / 16 MB Flash | 80+ | USB-C | 3.3V ⚠ | WiFi, BLE, CAN, Ethernet (carrier) | AI, industrial, advanced prototyping. Dual-core parallel execution. | Datasheet |
| Portenta X8 | NXP i.MX 8M Mini + STM32H747 | 16 GB eMMC / 2 GB RAM | 80+ | USB-C | 3.3V ⚠ | Linux, WiFi, BLE, Ethernet | Edge computing, containerized applications. Runs Linux + real-time M4 simultaneously. | Datasheet |
| GIGA | ||||||||
| GIGA R1 WiFi | STM32H747 (Cortex-M7 + M4) | 2 MB Flash / 1 MB SRAM | 76 | USB-C | 3.3V ⚠ | WiFi, BLE, HDMI | Multimedia, robotics, high I/O. HDMI output, USB-C Host OTG, audio jack. | Datasheet |
| NICLA SERIES | ||||||||
| Nicla Vision | STM32H747 (Cortex-M7 + M4) | 2 MB / 1 MB + 16 MB QSPI | Castellated pins | USB 2.0 | 1.8-3.3V ⚠ | WiFi, Bluetooth | Edge AI with a camera: TinyML, computer vision, sensor fusion, thumb-sized. | Datasheet |
| Nicla Sense ME | nRF52832 (Cortex-M4) | 512 KB / 64 KB | Castellated pins | Micro USB | 3.3V ⚠ | Bluetooth | Motion and environment sensor fusion for wearables, no camera needed. | Datasheet |
⚠ = Important caveat: see board notes. All specs reflect official Arduino boards. Third-party clones may vary.
Choosing the Right Board for Your Project
Choosing the right Arduino board is about matching capabilities to constraints. The most powerful board isn't the best choice for every project: sometimes the right answer is a $4 Nano, and sometimes it's a Portenta H7. The key is knowing which questions to ask before you buy.
The sections below walk through the most common project types and which boards consistently perform best in each category, along with the reasoning behind the recommendation. If your project straddles two categories, pick the one that represents your tightest constraint.
Beginners and Education
If you're just starting with Arduino, or if you're building curriculum for a classroom, the decision criteria are different than for experienced builders. What matters here is simplicity, documentation density, and community support. You want a board where almost every question you'll encounter has already been asked and answered on a forum somewhere, and where the libraries you need all list it as a supported platform.
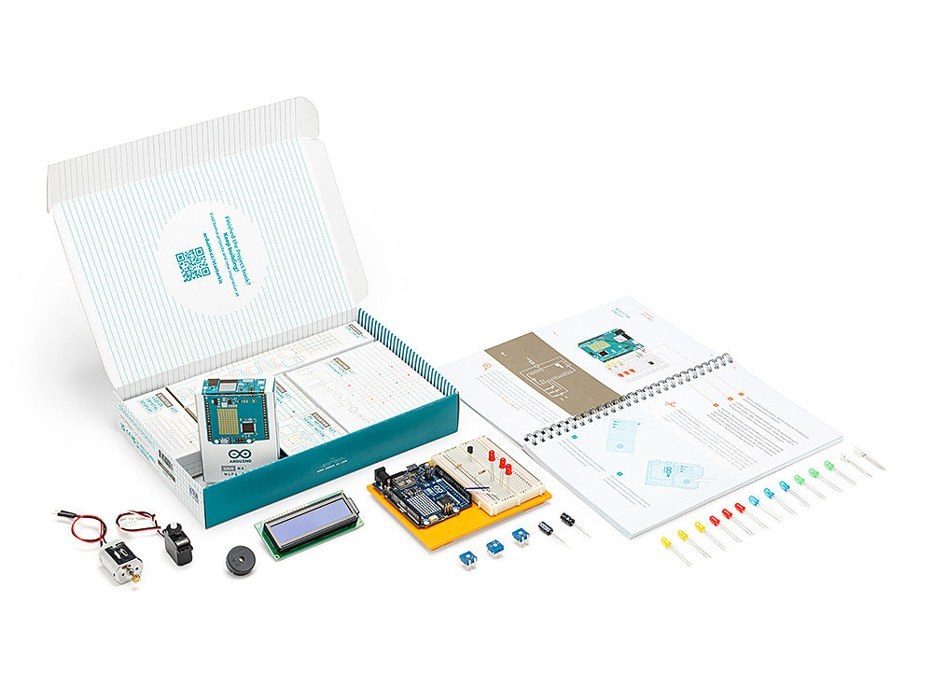
The Arduino Starter Kit R4 packs a board, a project book, and the parts for 13 projects into one box. Photo: Arduino.
The Uno R3 is still the default recommendation for this reason. Its community resources are simply unmatched. The Uno R4 Minima is worth considering if you want more memory and processing power right out of the gate without sacrificing shield compatibility or the 5V logic level most beginners' sensors expect. The Nano Every is a strong budget-friendly option if physical size or cost is a constraint in a classroom kit scenario. The Leonardo earns a spot on this list specifically if USB HID projects are part of the curriculum. There's no better learning board for building things that interact with a computer as a keyboard or mouse.
Recommended boards: Arduino Uno R3, Arduino Uno R4 Minima, Arduino Nano Every, Arduino Leonardo
Compact and Space-Constrained Projects
Once you move past the prototyping phase and need to fit your build into an enclosure, a wearable, or a permanent installation, the Uno's size becomes a liability. This is where the Nano family earns its place. The classic Nano fits directly across the center of a standard breadboard and is small enough to embed in almost any finished project. Many makers use the Uno to prototype, then swap in a Nano for the final build: same chip, same code, smaller footprint.
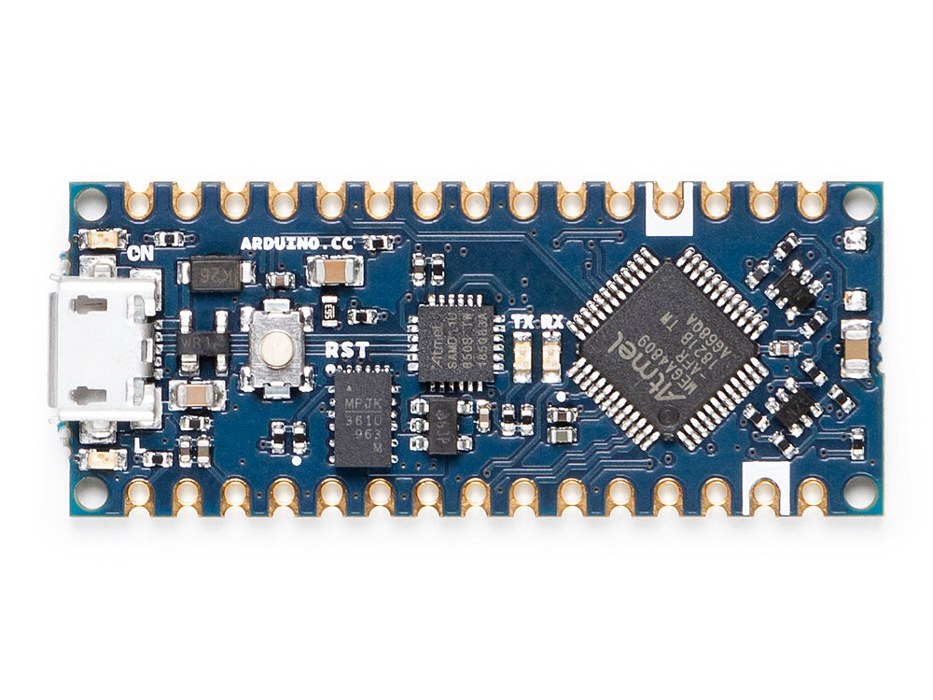
The Arduino Nano Every is a good example of a compact board: it is about the size of a stick of gum. Photo: Arduino.
For projects that need wireless connectivity in a compact package, the Nano 33 IoT and Nano RP2040 Connect are the go-to options. Both offer WiFi and Bluetooth in the same breadboard-friendly form factor. Just be aware that both are 3.3V logic boards, which means you need to check voltage compatibility with any sensors you're connecting to them. A 5V sensor connected without level shifting to a 3.3V I/O pin can damage the board.
Recommended boards: Arduino Nano, Arduino Nano Every, Arduino Nano 33 IoT, Arduino Nano RP2040 Connect
Wireless and IoT Projects
For projects that need to talk to the internet, a phone, a gateway, or another device wirelessly, your board choice is largely determined by which radio technology fits your deployment scenario. WiFi and Bluetooth are covered by the Nano 33 IoT, Nano RP2040 Connect, MKR WiFi 1010, and Uno R4 WiFi. If the project specifically needs to join a Matter or Thread smart-home network (working directly with Apple Home, Google Home, or Amazon Alexa, no separate hub), the Nano Matter is built for exactly that. If your project needs to reach outside your local network via cellular, the MKR GSM 1400 (GSM/3G) and MKR NB 1500 (NB-IoT/LTE-M) handle that. For long-range, low-power deployments across a LoRaWAN network (agriculture sensors, utility monitoring, smart city applications), the MKR WAN 1310 is the tool for the job.
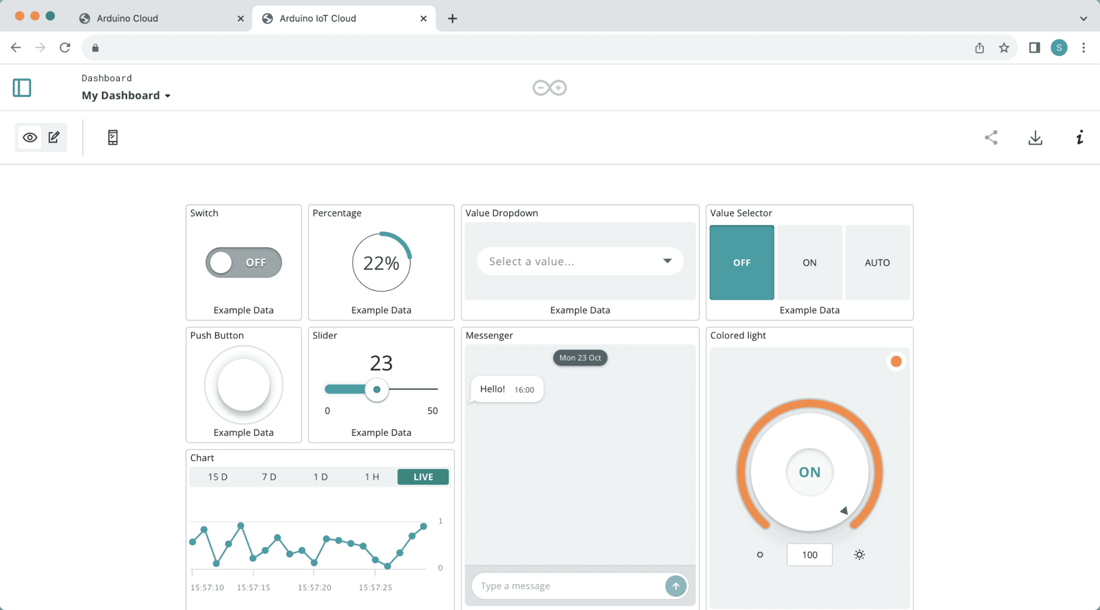
Wireless boards can feed data to an Arduino Cloud dashboard like this one, which you can watch from a phone or computer. Screenshot: Arduino Cloud.
The MKR family is also worth noting specifically for battery-powered deployments. All MKR boards include a JST Li-Po connector with onboard charging circuitry, and several include hardware crypto chips for secure communications in production environments. If you're deploying a device in the field that needs to run for months on a battery and phone home periodically, a MKR board is the right architecture to start with.
Recommended boards: Arduino MKR WiFi 1010, Arduino MKR NB 1500, Arduino MKR WAN 1310, Arduino Nano RP2040 Connect, Arduino Uno R4 WiFi, Arduino Nano Matter
High Pin Count Projects
Running out of I/O pins is one of the most common reasons a project needs a board upgrade. If you're controlling a lot of servos, driving a large relay board, managing multiple sensors on separate digital lines, or building something like a CNC controller or 3D printer, the Uno's 14 digital pins disappear fast. The Mega 2560 solves this with 54 digital I/O pins (15 with PWM), 16 analog inputs, and four hardware UARTs.
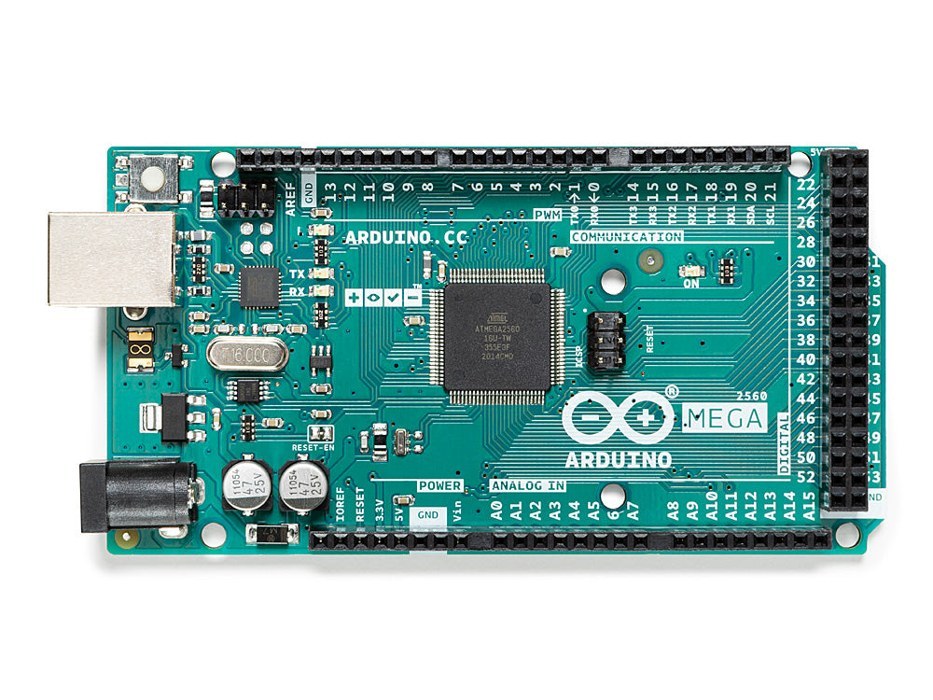
The Arduino Mega 2560 is the classic answer when you run out of pins. Photo: Arduino.
The four hardware UARTs on the Mega deserve special mention. Projects that communicate with multiple serial devices simultaneously (a GPS module, a GSM modem, a Bluetooth adapter, a serial display) can do so cleanly on the Mega without any software serial tricks or bus sharing. That alone makes it the right answer for a surprising number of complex builds.
Recommended boards: Arduino Mega 2560
High Performance and Real-Time Projects
When 16 MHz and 8-bit arithmetic aren't enough (signal processing, audio generation, fast sensor fusion, or anything that needs real floating-point performance), you need a 32-bit board. The Due's 84 MHz ARM Cortex-M3 and two 12-bit DAC outputs make it the right choice for audio generation and precision analog output. The GIGA R1 WiFi's dual-core STM32H747 (480 MHz + 240 MHz) handles the most demanding consumer projects, including ML inference, high-fidelity audio, and robotics platforms with many simultaneous tasks. For production-grade industrial deployments at this performance level, the Portenta H7 puts the same STM32H747 into a high-density form factor designed for enclosures and carrier boards. If the project needs real Linux, not just a fast microcontroller, the Uno Q and the Portenta X8 both pair a Linux-capable processor with a real-time MCU on the same board, in an Uno footprint for the Uno Q and an industrial carrier-board footprint for the X8.
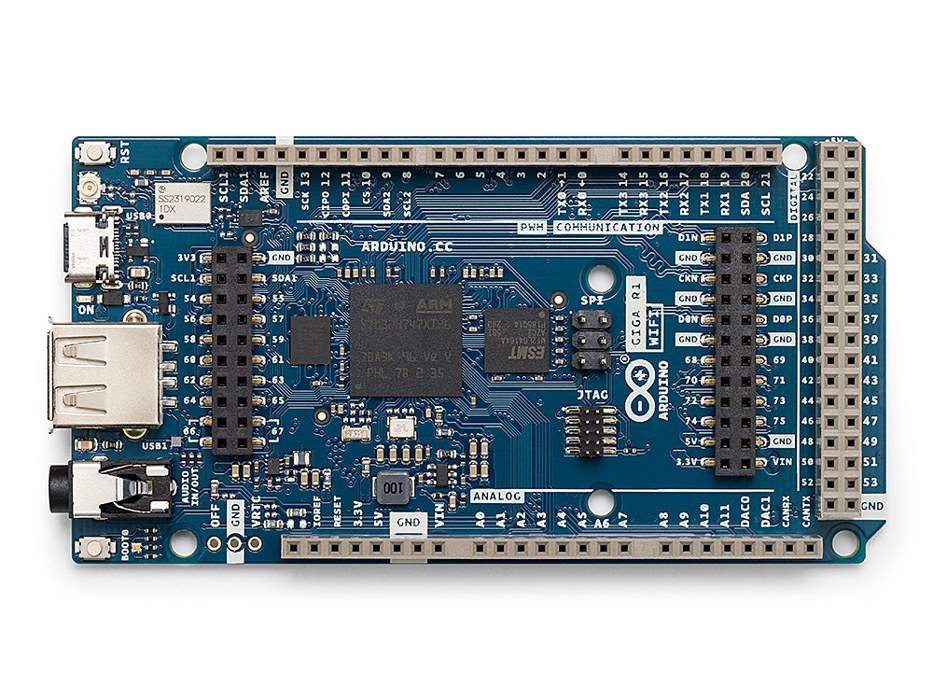
The Arduino GIGA R1 WiFi offers a dual-core processor and 76 pins in the Mega board shape. Photo: Arduino.
One important note if you're coming from the Uno: all of these boards use 3.3V logic. The jump from 5V to 3.3V is the most common voltage compatibility trap in the Arduino ecosystem. If you're migrating an existing project to a higher-performance board, audit every sensor and module in your circuit for 5V tolerance before you wire anything.
Recommended boards: Arduino Due, Arduino GIGA R1 WiFi, Arduino Portenta H7, Arduino Portenta X8, Arduino Uno Q
Industrial and Field Prototyping
Field deployments have different requirements than benchtop prototypes. You need boards that handle extended operating conditions, support the communication protocols used in industrial environments (CAN bus, Ethernet, LoRaWAN), and can be integrated into custom carrier boards or enclosures. The Portenta family is built for this. The Portenta H7 and X8 both support industrial connector systems, Ethernet (via carrier board), CAN bus, and operate with the reliability expected in commercial deployments. The MKR NB 1500 covers the cellular IoT use case for remote deployments where WiFi infrastructure doesn't exist.
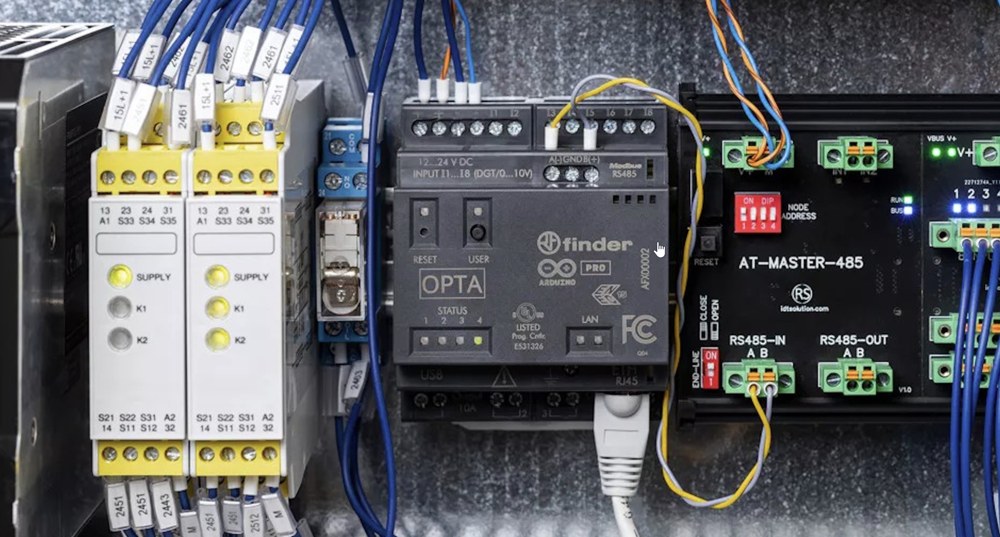
An Arduino Opta mounted on a DIN rail inside an electrical cabinet, wired to other industrial modules. Photo: Arduino.
Recommended boards: Arduino Portenta H7, Arduino Portenta X8, Arduino MKR NB 1500, Arduino MKR WAN 1310
Pinout and GPIO Explained
Every Arduino board exposes a set of GPIO (General-Purpose Input/Output) pins that enable it to interact with the physical world. These pins aren't just simple on/off switches. Depending on the board and the specific pin, they can support analog input, PWM output, hardware serial communication, I2C, SPI, interrupt triggering, and more. Understanding what a pinout diagram is actually telling you is one of the most practically useful skills you can develop early on.
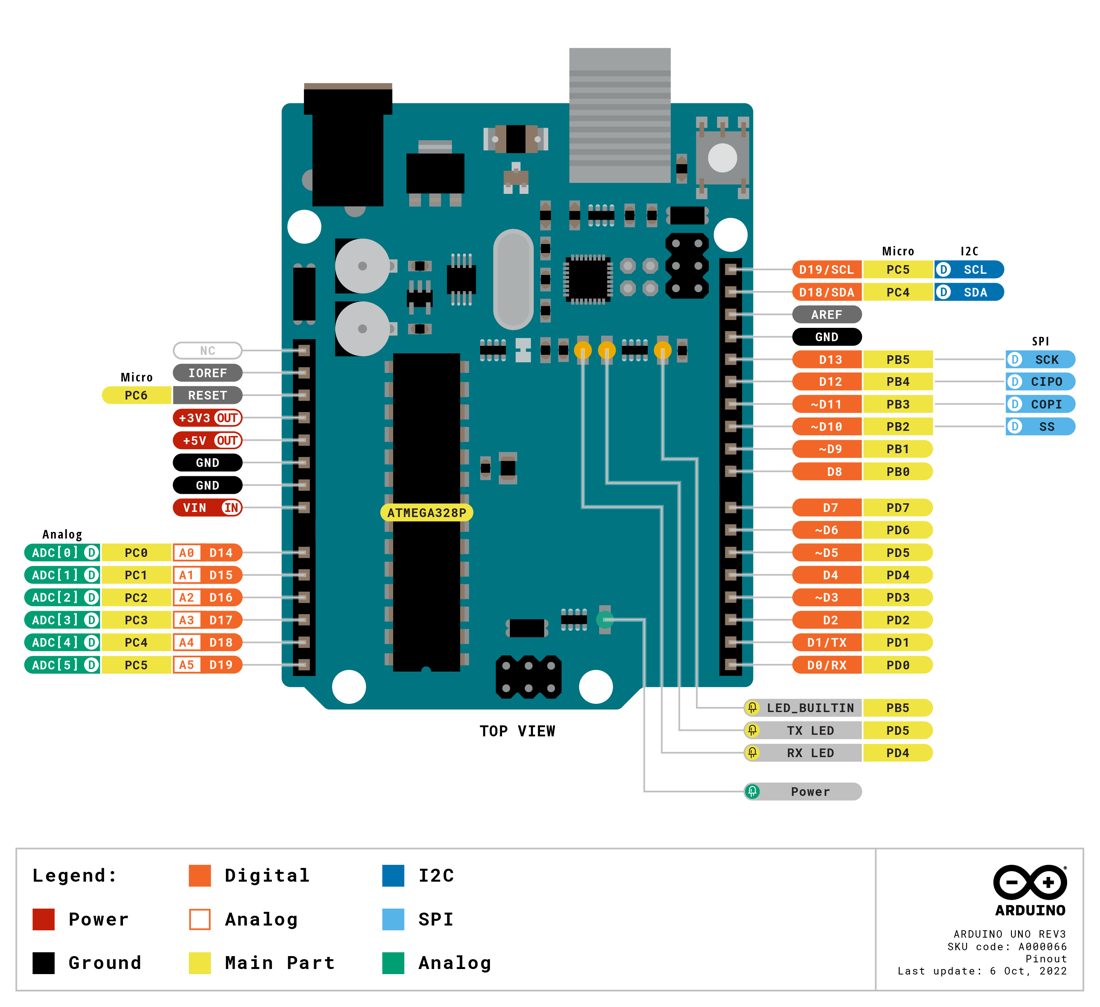
Pinout diagram of the Arduino Uno R3: each pin is labeled and color coded by what it can do. Pinout: Arduino.
Common Pin Types and Capabilities
Digital I/O: These pins read or write a binary state: HIGH (voltage present) or LOW (ground). On a 5V board, HIGH is nominally 5V; on a 3.3V board, HIGH is nominally 3.3V. Used for everything from reading a button press to toggling a relay. On the Uno, you have 14 digital I/O pins labeled D0 through D13.
Analog Inputs (ADC): Labeled A0 through A5 on the Uno, these pins feed an analog-to-digital converter that measures an input voltage and returns a number between 0 and 1023 (10-bit ADC) or higher on newer boards. A 5V board reading a 2.5V input returns roughly 512. These are inputs only on the Uno and Nano; you can't write an analog voltage to them directly. On the Nano, A6 and A7 are analog-input-only pins with no digital I/O capability, a detail that matters when porting code between the Uno and Nano.
PWM Output: Marked with a tilde (~) on most boards (~3, ~5, ~6, ~9, ~10, ~11 on the Uno). PWM (Pulse Width Modulation) rapidly switches a digital pin between HIGH and LOW to simulate an analog output voltage. An analogWrite(pin, 128) call produces approximately half the supply voltage in effective output. PWM is how you dim an LED, control servo position, or drive a motor speed controller. Only PWM-capable pins support analogWrite(): calling it on a non-PWM pin just gives you digital HIGH or LOW, which is a common and confusing mistake.
Hardware Serial (UART): D0 (RX) and D1 (TX) on the Uno are the hardware serial pins connected to both the USB-to-serial chip and the Arduino's UART. They're used for the Serial Monitor, but also for communicating with external devices like GPS modules, GSM modems, and Bluetooth adapters. The Mega has four hardware UARTs (Serial, Serial1, Serial2, Serial3), which is one of its biggest practical advantages over the Uno for complex builds.
I2C (Wire): On the Uno, A4 is SDA and A5 is SCL. I2C is a two-wire bus protocol that lets you connect multiple devices on the same two wires using unique addresses. It's how most sensors and OLEDs communicate with Arduino. You'll use Wire.h for I2C communication; it's covered in depth in the I2C articles in this series.
SPI: On the Uno, pins 10 (CS), 11 (MOSI), 12 (MISO), and 13 (SCK) form the SPI bus. SPI is faster than I2C and used for SD card modules, high-speed displays, and certain sensors that need fast data transfer.
Interrupt Pins: On the Uno, pins 2 and 3 support hardware interrupts. These let you execute a specific function immediately in response to a pin state change, regardless of what the main loop is doing. Interrupts are essential for responsive button handling, encoder reading, and anything where you can't afford to miss an event by polling. The Mega, Due, and 32-bit boards offer interrupt capability on many more pins.
Special Pins Worth Knowing
RESET: Pulling this pin LOW resets the board. It's the pin the IDE triggers during code uploads, and it's also used by some shields and peripherals to initiate a controlled restart.
AREF: Allows you to set a custom reference voltage for the ADC. By default the ADC uses the board's supply voltage as reference, meaning the full 0–1023 range spans 0–5V (or 0–3.3V). If your sensor outputs 0–2.5V, wiring a 2.5V reference to AREF and calling analogReference(EXTERNAL) spreads the full 0–1023 range across just 0–2.5V, giving you roughly twice the resolution for that sensor's output range.
VIN: Accepts an unregulated input voltage (7–12V recommended) that passes through the onboard regulator before powering the board. Use this when powering from a battery or wall adapter. Do not exceed 12V: the regulator will dissipate the excess as heat and can be damaged at higher voltages under load.
IOREF: Present on newer boards like the Uno R3 and R4. This pin outputs the board's logic voltage level (5V or 3.3V) and allows smart shields to detect which voltage standard the host board is using and adapt accordingly.
DAC Pins (Due and GIGA R1 WiFi): The Due exposes DAC0 and DAC1, which output true analog voltages via a 12-bit DAC. This is not the same as PWM. A DAC can output a steady mid-rail voltage or generate smooth waveforms. Indispensable for audio applications and precision analog control.
Li-Po Battery Connector (MKR and Nano 33 boards): These boards include a JST connector and onboard charging circuit for a single-cell Li-Po battery (nominal 3.7V). The VBAT pin on some of these boards lets you read the current battery voltage in code, which is useful for implementing low-battery warnings or power-save modes in deployed devices.
Boot Mode and BOOTSEL: The Nano RP2040 Connect has a BOOTSEL button; holding it while plugging in USB puts the board into bootloader mode for firmware flashing. The Due has an ERASE pin that wipes flash memory. The Portenta H7 includes boot configuration jumpers. These are infrequently needed but worth knowing when you're troubleshooting a board that won't respond to uploads.
Misusing any of these special pins (applying 5V to the AREF pin without the right configuration, exceeding VIN voltage limits, connecting a 5V signal to a 3.3V I/O pin) can damage the board or produce behavior that's very hard to diagnose. When in doubt, read the pinout diagram and the datasheet for your specific board before wiring.
Complete List of Arduino Board Datasheets
Every official Arduino board has a dedicated documentation page on the Arduino Docs Hub covering electrical characteristics, pin mappings, memory specifications, and recommended operating conditions. When you're unsure about a specific pin's behavior or maximum current rating on your board, this is where to look first.
- Arduino Uno R3 Datasheet
- Arduino Uno R4 Minima Datasheet
- Arduino Uno R4 WiFi Datasheet
- Arduino Uno Q Datasheet
- Arduino Nano Datasheet
- Arduino Nano Every Datasheet
- Arduino Nano 33 IoT Datasheet
- Arduino Nano RP2040 Connect Datasheet
- Arduino Nano 33 BLE Sense Rev2 Datasheet
- Arduino Nano Matter Datasheet
- Arduino Mega 2560 Datasheet
- Arduino Due Datasheet
- Arduino Leonardo Datasheet
- Arduino Micro Datasheet
- Arduino MKR WiFi 1010 Datasheet
- Arduino MKR GSM 1400 Datasheet
- Arduino MKR NB 1500 Datasheet
- Arduino MKR WAN 1310 Datasheet
- Arduino Portenta H7 Datasheet
- Arduino Portenta X8 Datasheet
- Arduino GIGA R1 WiFi Datasheet
- Arduino Nicla Vision Datasheet
- Arduino Nicla Sense ME Datasheet
Powering Your Arduino
Power is one of those topics that looks simple on the surface and gets surprisingly deep once your projects grow beyond a blinking LED. Getting it wrong can cause anything from mysterious resets and sensor glitches to permanently damaged components. Getting it right means your project runs reliably every time, whether it's sitting on your desk or deployed in a field enclosure.
Power Input Methods
USB: The default for development and most prototyping. USB supplies 5V directly from your computer or a USB wall adapter and simultaneously handles code uploads and serial communication. A standard USB 2.0 port is rated for 500 mA, though most wall adapters and powered hubs supply significantly more. USB is fine for the Arduino board itself plus a handful of low-current sensors, but it reaches its limits quickly once you start adding motors, relay boards, large LED strips, or multiple displays.
VIN / Barrel Jack: For projects that need more current, or that need to run away from a computer, the VIN pin and barrel jack accept a higher unregulated voltage (7–12V is the recommended range for most boards) that the onboard linear voltage regulator steps down to 5V or 3.3V for the board's internal use. This is the standard approach for wall-powered standalone projects.
There are two important considerations when using VIN. First, linear regulators dissipate the voltage difference as heat. At 12V input with a 5V output, the regulator is dropping 7V. If you're also drawing meaningful current through it, that regulator gets hot. If your project draws more than a few hundred milliamps, consider using an external buck (switching) regulator instead of relying on the onboard linear regulator. It's far more efficient and runs much cooler. Second, reverse polarity on VIN will damage the board immediately and permanently. There is no protection diode on most Arduino boards. Wire it correctly, or add your own protection diode in series.
Li-Po Battery: The MKR series and several Nano variants include a JST Li-Po connector with onboard single-cell charging circuitry. These boards are designed specifically for battery-powered deployments. The nominal voltage of a single-cell Li-Po is 3.7V, which the board's regulator handles appropriately. These boards also include power management features that let you put the microcontroller into low-power sleep modes to extend battery life between data transmissions, a critical capability for field-deployed sensor nodes.
Logic Voltage: The Detail That Breaks Projects
Different Arduino boards operate at different logic voltage levels, and this is one of the most common sources of damaged hardware and mysterious failures in the Arduino ecosystem.
The Uno, Mega, Nano (classic), and Leonardo all operate at 5V logic. The Due, all MKR boards, the Nano 33 series, the Nano RP2040 Connect, the GIGA R1 WiFi, and all Portenta boards operate at 3.3V logic.
Why does this matter? Because if you connect a 5V signal to a 3.3V board's I/O pin, you're applying a voltage that exceeds the maximum rated input voltage for that pin. In the best case, the pin reads incorrectly. In the common case, you degrade the chip over time. In the worst case, you damage it immediately. The ESP8266, most OLED breakouts, many GPS modules, most environmental sensors, and virtually all modern WiFi/Bluetooth modules operate at 3.3V. Plugging these into a 5V Uno without level shifting is technically fine most of the time because many have some tolerance built in, but "most of the time" is not the same as "safe," and on sensitive components it will cause problems.
The fix is straightforward. For signals going from a 5V board to a 3.3V device, you can use a simple two-resistor voltage divider for one-directional data lines (like UART TX). For bidirectional lines (like I2C SDA/SCL), use a dedicated level-shifter module such as the TXS0108E or a BSS138-based board. These are inexpensive and widely available, and they solve the problem cleanly.
Conversely, a 3.3V signal going into a 5V board's input pin is generally fine (3.3V is still above the HIGH threshold for most 5V AVR boards), but check your specific board's datasheet if you're unsure.
Current Draw: Plan Before You Power
Every component you add to a project draws current. The Arduino board itself draws roughly 30–70 mA when running, depending on the board and clock speed. A DHT22 temperature sensor draws around 1–2 mA. An SSD1306 OLED display draws 20–30 mA. A servo motor draws 100–400 mA under load. A WS2812B LED strip can draw up to 60 mA per LED at full white brightness. A 30-LED strip is potentially drawing 1.8 A just from the LEDs.
The most important rule: never run your project at the edge of your power supply's rated capacity. A 500 mA supply running a 450 mA load is a reliability disaster. Apply a safety factor of at least 1.5x to 2x. If your project needs 400 mA under typical load, use a 750 mA to 1 A supply minimum. This headroom accounts for startup current spikes, peak usage moments, and prevents the voltage sag that causes I2C lockups, erratic sensor readings, and mysterious resets.
A practical diagnostic tip: if your project behaves erratically only under certain conditions: sensors reading wrong values when a motor kicks on, the board resetting when multiple servos move at once, I2C devices dropping off the bus randomly, power supply issues are the first thing to check. Measure the voltage on the 5V rail or 3.3V rail with a multimeter while the circuit is running. If it dips below about 4.75V (for a 5V board) under load, your supply is undersized or your wiring has too much resistance.
Protecting Your Board
A few habits that prevent the most common forms of hardware damage:
- Never connect a motor's power supply directly to the Arduino's power pins. Use an external supply for the motor and share only the ground connection with the Arduino.
- Always use flyback diodes across motor and solenoid coils: inductive loads generate voltage spikes when switched off that can destroy digital pins.
- Add a decoupling capacitor (100 nF ceramic, optionally in parallel with a 10–100 µF electrolytic) close to the power pins of any module that draws variable current. This buffers the supply against the transient current demands the module creates.
- Use a bench power supply with current limiting when first testing a new circuit. If something is wired wrong and draws excess current, the supply will cut off before anything gets hot.
- On 3.3V boards, check every sensor and module in your circuit against the board's rated maximum input voltage before applying power for the first time. Once you've fried a pin, it stays fried.
Arduino IDE and Language Overview
Every board in the Arduino lineup is programmed through the Arduino IDE (Integrated Development Environment). It's the tool you use to write your code, compile it, and upload it to the board, and it's free on Windows, macOS, and Linux. If you haven't installed it yet, grab it at arduino.cc/en/software. The current version is Arduino IDE 2.x, which adds autocomplete, integrated debugging, and a better library manager over the classic 1.x IDE.
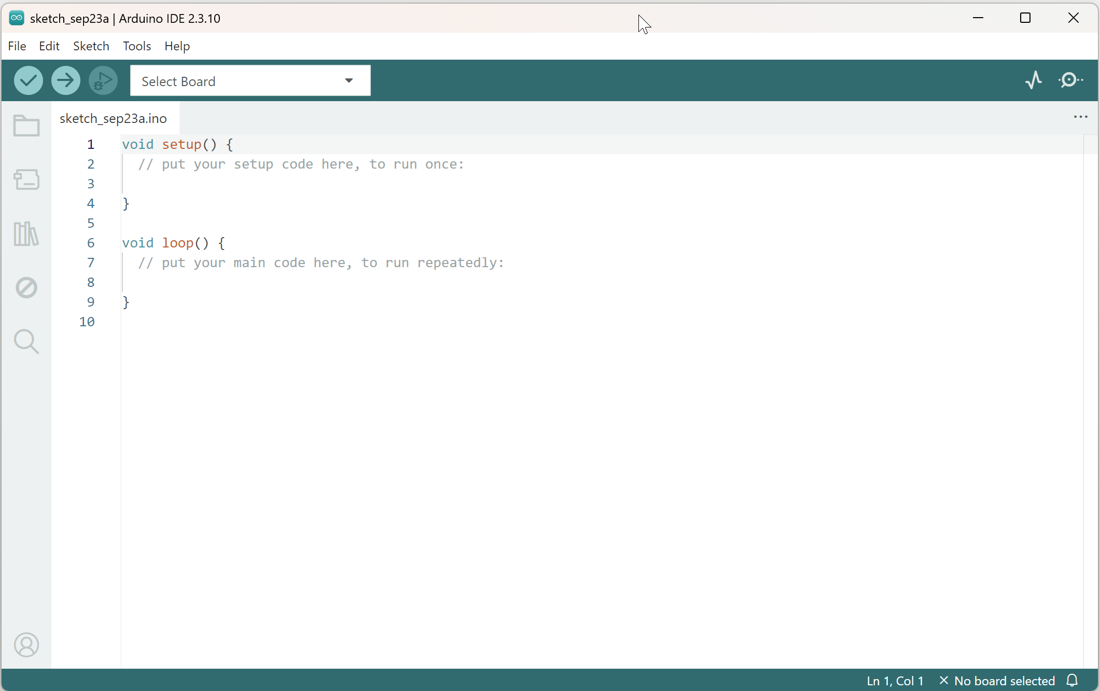
The Arduino IDE 2 with a new, empty sketch open. Screenshot: Arduino IDE.
Key Features of the Arduino IDE
Code Editor: A clean interface with syntax highlighting, auto-indentation, and code folding. Arduino IDE 2.x adds proper autocomplete, which makes learning new functions and libraries significantly easier since you can see available methods without having to leave the editor.
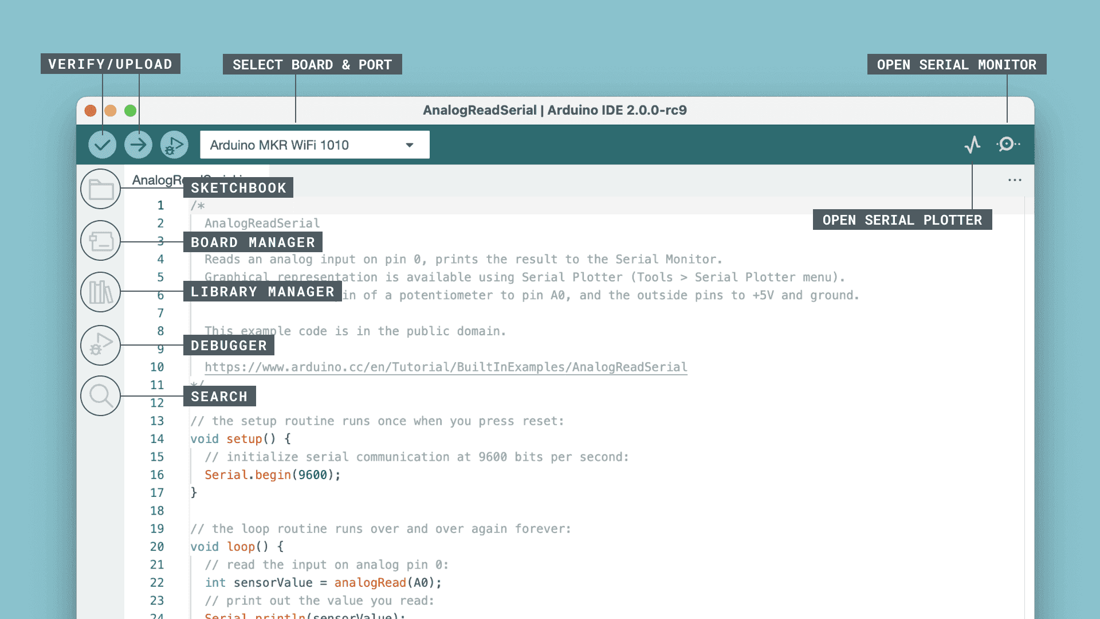
The main parts of the Arduino IDE 2, labeled. Screenshot: Arduino IDE.
Serial Monitor and Serial Plotter: The Serial Monitor displays text output from your board in real time, which is your primary debugging tool. The Serial Plotter graphs numeric serial output in real time, useful for visualizing sensor data, PID tuning, and signal analysis. Both are accessible from the Tools menu.
Board Manager: Allows you to install support packages (called "cores") for non-AVR boards. To program an ESP32, STM32, Nano RP2040 Connect, or any other non-AVR board, you first install its core through the Board Manager, then select it from the board list before compiling. Each core contains the necessary compiler toolchain, linker scripts, and hardware abstraction layer for that specific processor family.
Library Manager: Search, browse, and install from thousands of community and official libraries directly inside the IDE. No manual ZIP downloads required for most libraries. Libraries install to a local directory and are immediately available for use in any sketch.
Built-in Examples: Hundreds of example sketches organized by function and library. File > Examples is one of the most underused features in the IDE. For any library you install, its examples appear in this menu immediately, giving you working reference code to start from.
Advanced Tools
Arduino CLI: A command-line tool for compiling and uploading sketches, managing libraries and board cores, and automating builds. Useful for CI/CD pipelines, scripted testing, and developers who prefer working in a terminal or integrating Arduino builds into larger build systems.
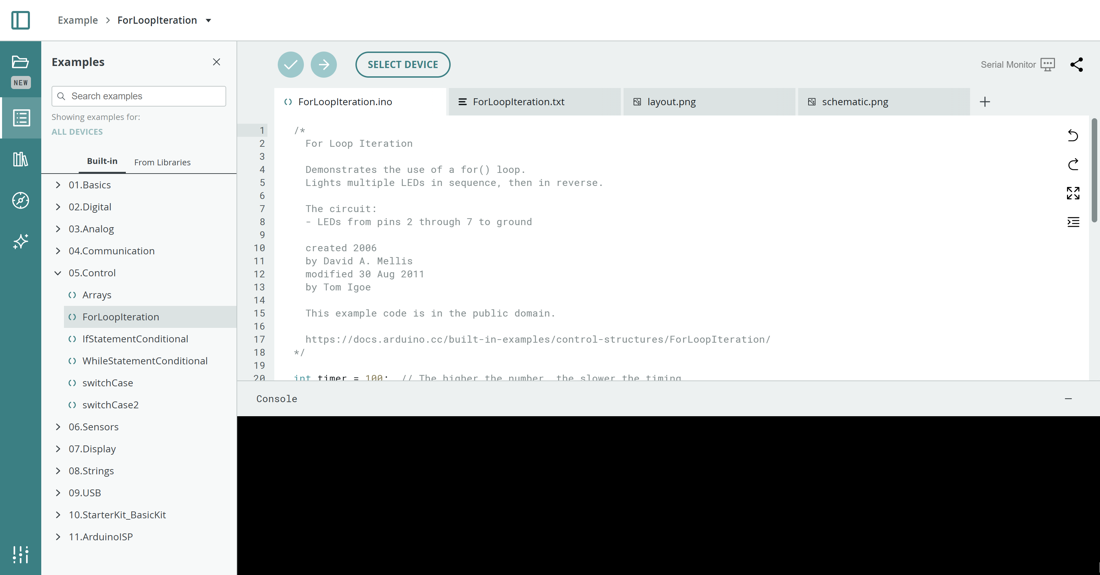
The Arduino Cloud Editor runs in a web browser, so there is nothing to install. Screenshot: Arduino Cloud Editor.
PlatformIO: A popular extension for VS Code that turns it into a full-featured Arduino development environment. PlatformIO offers per-project library management (no global library conflicts), version control integration, advanced debugging with hardware debuggers, static analysis, and multi-board project support. It's the tool of choice for many professional embedded developers who need more than the standard IDE provides.
Arduino Cloud: A browser-based IDE that requires no local installation. Supports OTA (Over-the-Air) firmware updates for connected boards, cloud-hosted IoT dashboards, and real-time device monitoring. Particularly useful for remote boards where physical access for updates isn't practical.
Arduino Language Overview
The Arduino language is a simplified dialect of C++ wrapped by the Arduino core libraries. If you already know C or C++, you'll feel at home immediately. If you don't, the Arduino layer removes most of the complexity that makes raw C++ intimidating for beginners. You don't need to write startup code, configure clock sources, or manage linker scripts. The framework handles all of that.
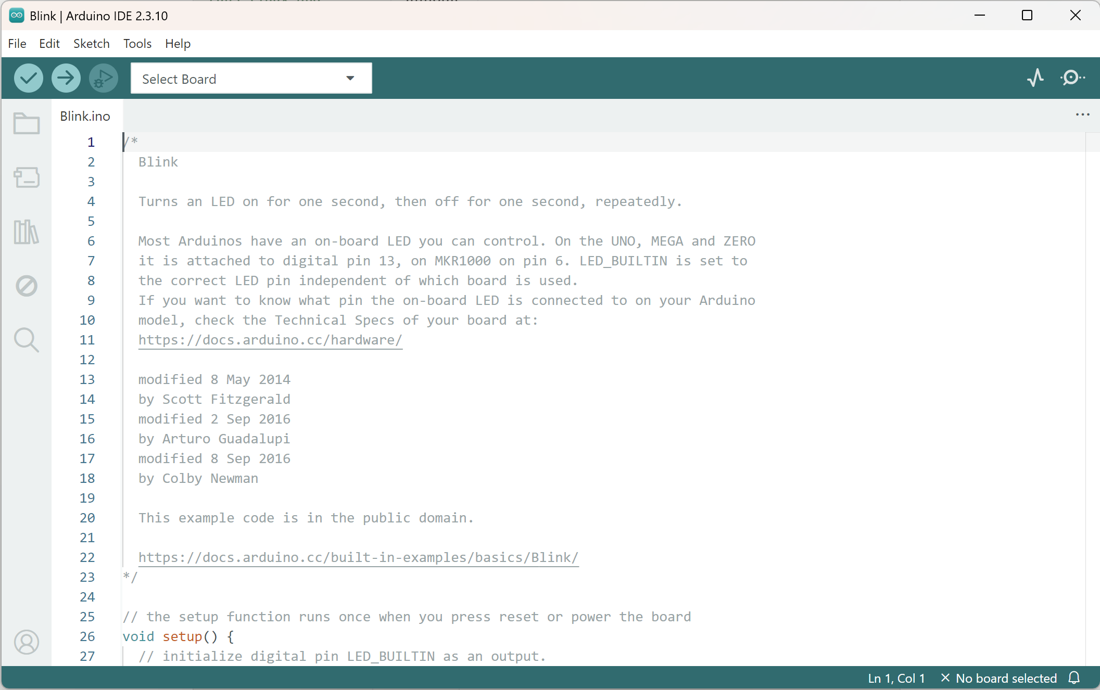
The Blink example in the Arduino IDE: every sketch has a setup() function and a loop() function. Screenshot: Arduino IDE.
Every Arduino sketch has the same basic structure:
void setup() {\\\
\\\\\\\
  // Runs once when the board powers on or resets\\\
\\\\\\\
}\\\
\\\\\\\
\\\
\\\\\\\
void loop() {\\\
\\\\\\\
  // Runs continuously after setup() completes\\\
\\\\\\\
}
setup() is where you initialize pins, start serial communication, configure libraries, and perform any one-time startup tasks. loop() is where your application logic runs: it executes repeatedly, as fast as the processor can manage, until power is removed or the board is reset.
The core functions you'll use in almost every sketch:
pinMode(pin, mode): Configures a pin asINPUT,OUTPUT, orINPUT_PULLUP. Always set this before reading or writing a pin.digitalWrite(pin, HIGH/LOW): Sets a digital output pin to its high or low state.digitalRead(pin): Reads the current state of a digital input pin. ReturnsHIGHorLOW.analogRead(pin): Reads the voltage on an analog input pin and returns a value from 0 to 1023 (10-bit ADC on most boards).analogWrite(pin, value): Outputs a PWM signal on a PWM-capable pin. Value ranges from 0 (always off) to 255 (always on). Only works on PWM pins marked with ~.delay(ms): Pauses execution for a specified number of milliseconds. Convenient for simple timing, but blocks all other processing during the delay. Avoid it in any sketch that needs to respond to inputs or run multiple tasks concurrently.millis(): Returns the number of milliseconds since the board was last reset. Used for non-blocking timing: checking whether enough time has elapsed rather than halting execution to wait. This is the correct tool for timing in any sketch more complex than a simple demo.
For communication, the standard libraries are:
Serial: UART communication.Serial.begin(9600)starts the connection at 9600 baud;Serial.print()sends data to the Serial Monitor. Covered in depth in Part 3.Wire: I2C communication.Wire.begin()initializes the I2C bus;Wire.beginTransmission(address)andWire.endTransmission()handle device communication. The full I2C workflow is covered in the Mastering I2C article in this series.SPI: High-speed synchronous serial communication for SD cards, displays, and certain sensors.
Best Practices Worth Knowing from the Start
Replace delay() with millis() as soon as possible. delay() is the first timing tool beginners reach for and the first one they outgrow. As soon as your sketch needs to do more than one thing (read a button while blinking an LED, poll a sensor while updating a display), delay() becomes a liability. The millis() pattern replaces it cleanly and scales to any number of concurrent tasks. We cover this pattern in depth in Part 4.
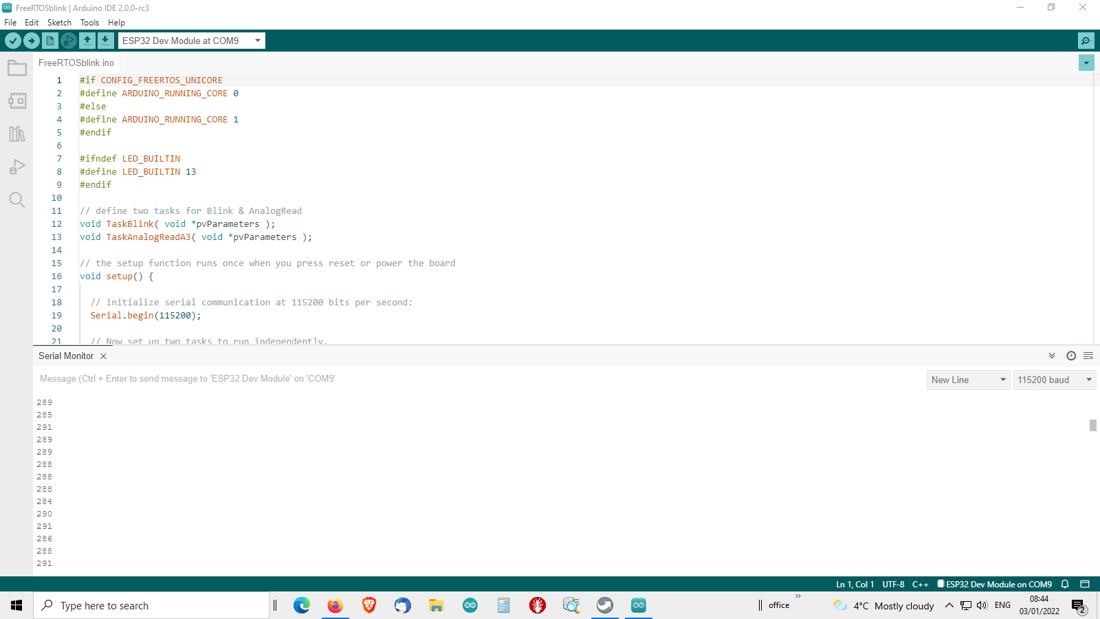
The Serial Monitor, docked under the code, is one of the best debugging tools you have. Screenshot: Arduino IDE.
Comment your pin assignments. A sketch that declares int sensorPin = A2; at the top and then uses sensorPin throughout the code is far easier to read, modify, and debug than one that uses raw pin numbers everywhere. When you rewire something, you change one line instead of hunting through the entire sketch.
Test incrementally. Add one sensor or one function at a time and verify it works before adding the next. When everything is connected at once and something doesn't work, the debugging surface is enormous. When you add components one at a time and test each one, you always know which addition caused the problem.
Modularize complex sketches. The Arduino IDE supports multiple tabs in a sketch, and each tab can contain functions you call from the main sketch. For projects with more than a few hundred lines of code, breaking the sketch into logical files (sensor reading, display output, communication logic, etc.) makes it dramatically easier to maintain and debug.
Additional Resources and Helpful Links
The links below are the highest-signal resources in the Arduino ecosystem. These are the references that experienced builders actually use, not just the ones that appear at the top of a search result.
Official Documentation and Platforms
- Arduino Docs Hub: Complete documentation for every official board, including pin diagrams, tech specs, and getting started guides
- Arduino Language Reference: The authoritative reference for every core function, constant, and data type with syntax examples and usage notes
- Arduino IDE Download: Desktop IDE for Windows, macOS, and Linux. Currently at version 2.x.
- Arduino Cloud: Browser-based IDE with OTA updates, IoT dashboards, and real-time device monitoring
- Arduino Forum: The official community forum with nearly two decades of answered questions. Search here before posting anywhere.
Educational Content and Learning Hubs
- Arduino YouTube Channel: Official tutorials, project showcases, and new board walkthroughs
- Adafruit Learning System: Extensive project-based guides covering sensors, displays, libraries, and advanced techniques. Some of the best beginner-to-intermediate tutorials on the web.
- SparkFun Tutorials: Hardware-focused guides across a wide range of Arduino-compatible components, with strong coverage of communication protocols and sensors
- Hackaday Arduino Projects: Community showcase of creative and often technically ambitious builds
Datasheets and Hardware References
- Complete Arduino Datasheet Collection: Links to official tech specs for every current Arduino board
Where to Buy Arduino Boards
The table below covers the current official Arduino board lineup with purchase links from Amazon, SparkFun, and Seeed Studio wherever a listing exists. All boards are official Arduino products, not clones. If you're buying for a project covered in this series, the Uno R3 or Uno R4 Minima is the right starting point for most readers. The rest of the table is here for reference as your projects grow. A handful of the newest releases (the Uno Q, Nano Matter, Nano 33 BLE Sense Rev2, and Nicla Sense ME) also include a link to Arduino's own store alongside the Amazon one: they're recent enough that third-party listings weren't reliably confirmable at the time of writing.
| Family | Board | Amazon | SparkFun | Seeed Studio | Datasheet |
|---|---|---|---|---|---|
| UNO SERIES | |||||
| Uno Series | Arduino Uno R3 | Amazon | SparkFun | Seeed Studio | Datasheet |
| Uno Series | Arduino Uno R4 Minima | Amazon | SparkFun | Seeed Studio | Datasheet |
| Uno Series | Arduino Uno R4 WiFi | Amazon | SparkFun | Seeed Studio | Datasheet |
| Uno Series | Arduino Uno Q | Amazon | Official Store | n/a | n/a | Datasheet |
| Uno Series | Arduino Uno Mini Limited Edition | n/a | n/a | Seeed Studio | Datasheet |
| Uno Series | Arduino UNO Q, 4 GB RAM version | Amazon | n/a | n/a | Datasheet |
| NANO SERIES | |||||
| Nano Series | Arduino Nano | Amazon | n/a | n/a | Datasheet |
| Nano Series | Arduino Nano Every | Amazon | SparkFun | n/a | Datasheet |
| Nano Series | Arduino Nano 33 IoT | Amazon | SparkFun | n/a | Datasheet |
| Nano Series | Arduino Nano 33 BLE | Amazon | SparkFun | n/a | Datasheet |
| Nano Series | Arduino Nano RP2040 Connect | Amazon | n/a | Seeed Studio | Datasheet |
| Nano Series | Arduino Nano ESP32 [ABX00083] | Amazon | SparkFun | Seeed Studio | Datasheet |
| Nano Series | Arduino Nano ESP32 [ABX00092] | Amazon | SparkFun | n/a | Datasheet |
| Nano Series | Arduino Nano 33 BLE Sense Rev2 | Amazon | Official Store | SparkFun | Seeed Studio | Datasheet |
| Nano Series | Arduino Nano Matter | Amazon | Official Store | n/a | n/a | Docs |
| Nano Series | Arduino Nano R4 | Amazon | n/a | n/a | Datasheet |
| Nano Series | Arduino Nano V3 | Amazon | n/a | n/a | Datasheet |
| MEGA SERIES | |||||
| Mega Series | Arduino Mega 2560 | Amazon | SparkFun | n/a | Datasheet |
| Mega Series | Arduino Mega ADK | Amazon | n/a | n/a | Docs |
| DUE SERIES | |||||
| Due Series | Arduino Due | Amazon | n/a | n/a | Datasheet |
| LEONARDO / MICRO | |||||
| Leonardo / Micro | Arduino Leonardo | Amazon | n/a | n/a | Docs |
| Leonardo / Micro | Arduino Micro | Amazon | n/a | Seeed Studio | Docs |
| MKR SERIES | |||||
| MKR Series | Arduino MKR Zero [ABX00012] | Amazon | n/a | n/a | Docs |
| MKR Series | Arduino MKR WiFi 1010 [ABX00023] | Amazon | n/a | n/a | Datasheet |
| MKR Series | Arduino MKR WAN 1310 [ABX00029] | Amazon | n/a | n/a | Datasheet |
| MKR Series | Arduino MKR GSM 1400 | Discontinued | n/a | n/a | Docs |
| MKR Series | Arduino MKR NB 1500 | Amazon | n/a | n/a | Docs |
| GIGA | |||||
| GIGA | Arduino GIGA R1 WiFi | Amazon | SparkFun | n/a | Datasheet |
| PORTENTA FAMILY | |||||
| Portenta Family | Arduino Portenta H7 | Amazon | n/a | n/a | Docs |
| Portenta Family | Arduino Portenta H7 Lite Connected | Amazon | n/a | n/a | Docs |
| Portenta Family | Arduino Portenta H7 Lite | Amazon | n/a | n/a | Docs |
| Portenta Family | Arduino Portenta X8 | Amazon | n/a | n/a | Datasheet |
| Portenta Family | Arduino Portenta C33 | Amazon | SparkFun | n/a | Datasheet |
| Portenta Family | Arduino Portenta Max Carrier | Amazon | n/a | n/a | Datasheet |
| Portenta Family | Arduino Portenta Machine Control | Amazon | n/a | n/a | Datasheet |
| Portenta Family | Arduino Portenta UWB Shield | Amazon | n/a | n/a | Datasheet |
| NICLA SERIES | |||||
| Nicla Series | Arduino Nicla Vision | Amazon | SparkFun | n/a | Datasheet |
| Nicla Series | Arduino Nicla Voice | Amazon | SparkFun | n/a | Datasheet |
| Nicla Series | Arduino Nicla Sense Env | Amazon | n/a | n/a | Datasheet |
| Nicla Series | Arduino Nicla Sense ME | Amazon | Official Store | SparkFun | n/a | Datasheet |
| OPTA SERIES | |||||
| Opta Series | Arduino Opta Lite | Amazon | n/a | n/a | Docs |
| Opta Series | Arduino Opta RS485 | Amazon | n/a | n/a | Docs |
| Opta Series | Arduino Opta WiFi | Amazon | n/a | n/a | Docs |
| Opta Series | Arduino Pro Opta | Amazon | n/a | n/a | Docs |
| PRO MINI / FIO | |||||
| Pro Mini / Fio | Arduino Pro Mini 5V (16 MHz) | Amazon | SparkFun | n/a | Docs |
| Pro Mini / Fio | Arduino Pro Mini 3.3V (8 MHz) | Amazon | SparkFun | n/a | Docs |
| Pro Mini / Fio | Arduino Fio | n/a | SparkFun | n/a | Docs |
| SHIELDS | |||||
| Shields | Arduino Ethernet Shield R3 | Amazon | n/a | n/a | Docs |
| STARTER AND PROJECT KITS | |||||
| Starter And Project Kits | Arduino Sensor Kit Base | n/a | n/a | Seeed Studio | Docs |
| Starter And Project Kits | Arduino Smart Home Control Kit | n/a | n/a | Seeed Studio | n/a |
| Starter And Project Kits | Arduino Project Kit: Hands-free Dispenser | n/a | n/a | Seeed Studio | n/a |
| Starter And Project Kits | Arduino Smart Humidifier Kit | n/a | n/a | Seeed Studio | n/a |
| Starter And Project Kits | Arduino Water Usage Monitoring Kit | n/a | n/a | Seeed Studio | n/a |
| Starter And Project Kits | Arduino Science Kit Physics Lab | Amazon | n/a | n/a | Docs |
Wrap-Up and What's Next
From the Uno to the Portenta, you now have a map of the entire Arduino board ecosystem and a decision framework for navigating it. The key takeaway isn't memorizing specs. It's knowing which questions to ask before you buy. What are my I/O requirements? What voltage do my sensors run at? Does this project need wireless? Will it be battery powered? Does it need to fit in an enclosure? Answer those, match them to the right board family, and you'll make the right choice almost every time.
A few things worth bookmarking as you move forward: the Arduino Docs Hub for board-specific pinout and electrical specifications, the Language Reference when you encounter an unfamiliar function, and the Arduino Forum when something isn't working the way the documentation says it should. Between those three resources, you can find an answer to almost anything.
One last reminder before you go shopping: double-check the logic voltage of any board you're considering against the sensors and modules you plan to connect to it. The 5V/3.3V compatibility question is the single most common cause of damaged hardware in the Arduino ecosystem, and it's completely preventable if you check before you wire.
Up Next: Part 2.5: A Guide to Every Arduino Board, Pinout, Kit, and Legacy Board
Now that you have the map and a way to choose, Part 2.5 takes the boards one at a time. Every board, shield, and kit gets an overview, a photo, a pinout, a datasheet link, and a place to buy it, and there is a section on retired boards for anyone who has just inherited a box of old parts. After that, Part 3 covers what to do with the board you pick: how a sketch actually runs, the core functions you'll use in almost every project (pinMode(), digitalRead(), digitalWrite(), analogRead(), analogWrite()), how to install and manage libraries, how to keep an eye on your board's limited memory, and a simple debugging ritual using the Serial Monitor. Right after that, Part 4 replaces delay() with real non-blocking timing, using millis() to keep your sketch responsive to more than one thing at once. By the end of both, you'll have the foundation to write code that does what you intend it to do.
Want to go deeper? Download the full eBook once the series is complete, and don't forget to subscribe for the rest of the Arduino Mastery Series!
\\\ \\\ \ \




