

The first time I compiled an Arduino sketch from a terminal, it felt like I had skipped a step. There was no Verify button. There was no red error pane. I typed one line, the compiler ran, and a hex file appeared. Then I typed a second line and the Uno's RX LED flickered. Same result as the IDE, no window required.
Arduino CLI is that pair of lines, plus everything around them. A CLI, a command-line interface, is a program you run by typing commands in a terminal instead of clicking menus. Arduino CLI can update board indexes, install cores, install libraries, detect a board, compile a sketch, and upload firmware. Arduino's own documentation calls it more than a standalone tool. It is the heart of official Arduino development software, including Arduino IDE and the Arduino Web Editor. When you click Verify in IDE 2, you are asking this engine to compile.
This guide is the full desktop path: what the CLI is doing, how to install it on Windows (with macOS and Linux notes), how to create a config and a sketch, how to install a core, how to compile and upload, how to add libraries, how to add ESP32/ESP8266 indexes, and when you should still open the IDE. It is a command-line development guide, not a GitHub Actions tutorial. Automation and VS Code get their own articles later in this cluster.
If you have never written a sketch, start with Part 3 of the Mastering Arduino series. This article assumes you already know setup() and loop(), and that you want a faster, scriptable way to build them.
Why would you leave the IDE?
The hard way, the way most of us learned, is a stack of clicks. Open IDE 2. Tools → Board → Arduino Uno. Tools → Port → COM7. Sketch → Verify/Compile. Wait. Sketch → Upload. Wait. Tools → Serial Monitor. Change the baud rate. Do that again for a Nano, then for an ESP32, then for a second copy of the same sketch. None of those clicks are difficult. They are slow, they are easy to get wrong in a hurry, and they cannot run on a server that has no mouse.
The CLI is the same jobs as a sentence.
# Compile the sketch in the Blink folder for an Arduino Uno
arduino-cli compile --fqbn arduino:avr:uno ./Blink
# Send the compiled result to the Uno plugged into COM7
arduino-cli upload --fqbn arduino:avr:uno --port COM7 ./Blink
FQBN means Fully Qualified Board Name: vendor:architecture:board. arduino:avr:uno is "Arduino's AVR core, the Uno." You will type that string a lot. It is the CLI's replacement for Tools → Board.
You reach for this when:
-
You already understand the IDE and the menus are the slow part.
-
You want VS Code, Vim, or any other editor, and you still want Arduino's compiler.
-
You want one command that builds the same sketch for three boards.
-
You want a classroom or lab image where
arduino-cli core install arduino:avris more reliable than 24 people clicking Board Manager. -
You are heading toward CI (continuous integration: a server that builds every commit). That last one is the next article after this, not this one.
You do not have to quit IDE 2. I have not. The CLI and the IDE can share the same Arduino15 folder (cores, tools, indexes) and the same sketchbook. Learn the engine, keep the window for Serial Plotter and for days you want autocomplete.
What Arduino CLI is, under the hood
Arduino CLI is a single executable (arduino-cli.exe on Windows). Subcommands hang off it the way git commit hangs off git.
# List every top-level command the CLI knows
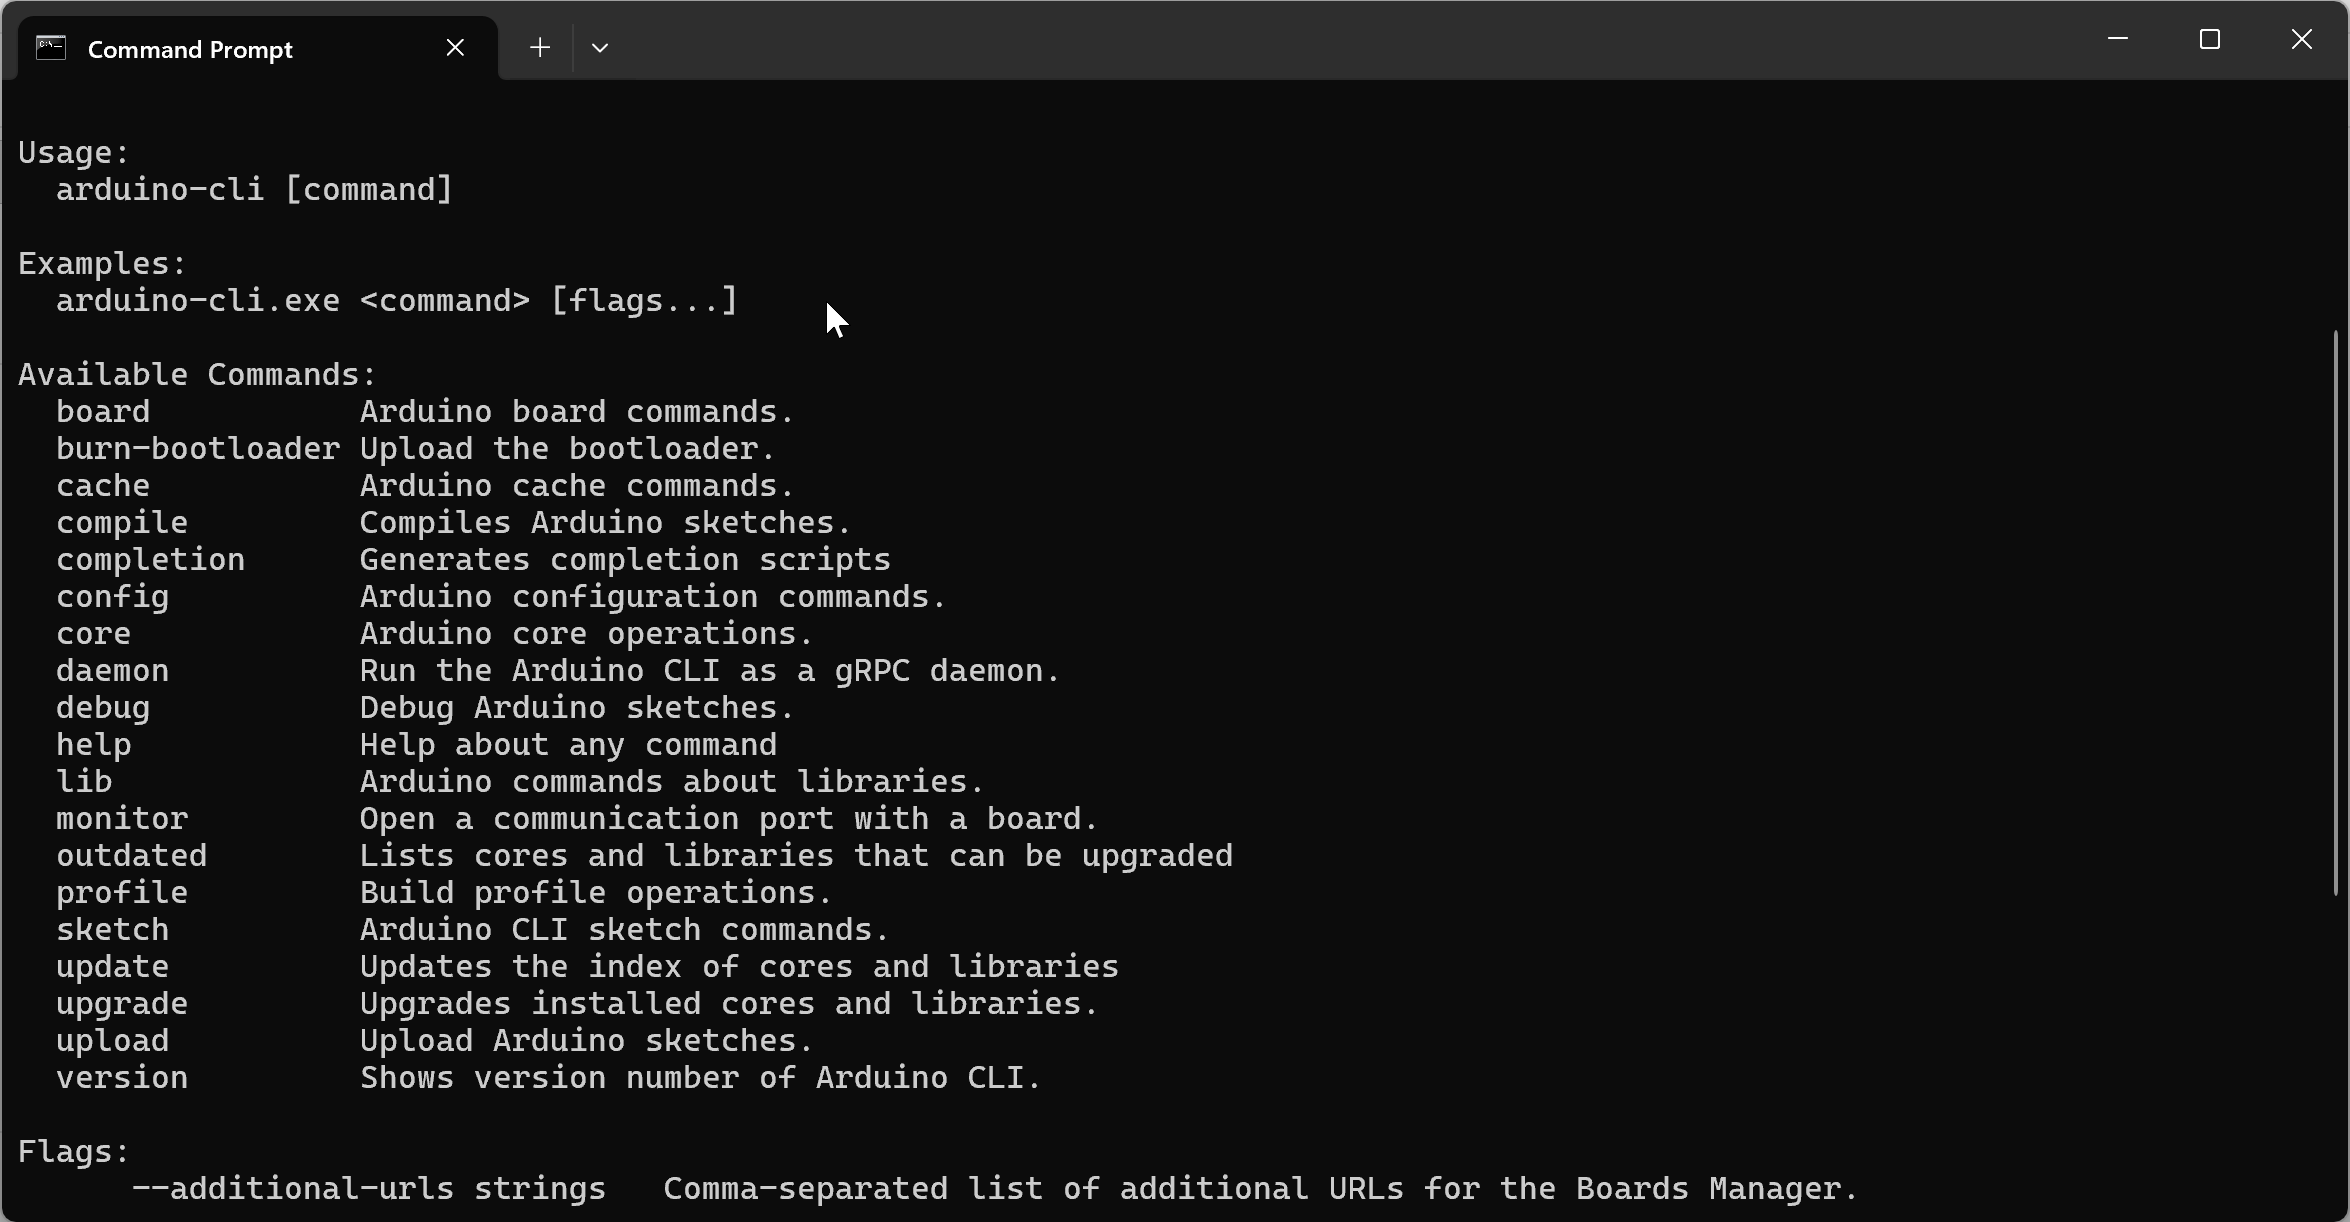
arduino-cli help
# Show the subcommands under "core" (install, list, search, ...)
arduino-cli help core
# Show every flag the compile command accepts
arduino-cli help compile
Each of those prints the flags for that command. I still do that when I forget a flag. There is no shame in it. The binary also speaks JSON (--json) so other programs can parse it, and it can run as a gRPC server (arduino-cli daemon) so editors and cloud tools can drive it without scraping text. gRPC is a way for programs to call functions on each other over a network-ish connection. IDE 2 talks to this family of interfaces. You do not need daemon mode to compile Blink. Knowing it exists explains why the IDE and the CLI stay in sync: they are not two compilers that happen to look similar.
Version, as of the docs I checked while writing this: 1.5.1. IDE 2.3.10 ships a CLI in that line internally. Installing the standalone CLI still makes sense. You get an arduino-cli command on your PATH you can call from any terminal, including ones the IDE never opened.
How to install Arduino CLI on Windows
I am going to be picky about PATH, because that is the step that makes the next twenty commands either work or look like the program is missing.
PATH is the list of folders Windows searches when you type a command. If arduino-cli is not in a folder on that list, PowerShell says the term is not recognized. The program can be sitting on your desktop and still "not exist" as far as the terminal is concerned.
Option A: the MSI installer (the one I use on a machine I own).
- Go to the Arduino CLI installation page or the GitHub releases.
- Download the Windows 64-bit MSI.
- Run it. Allow it to add the install directory to PATH if the installer offers that.
- Close every terminal window you already had open. PATH changes do not apply to terminals that were launched before the change.
- Open a new PowerShell and run:
# Print the CLI version. If this works, PATH is correct.
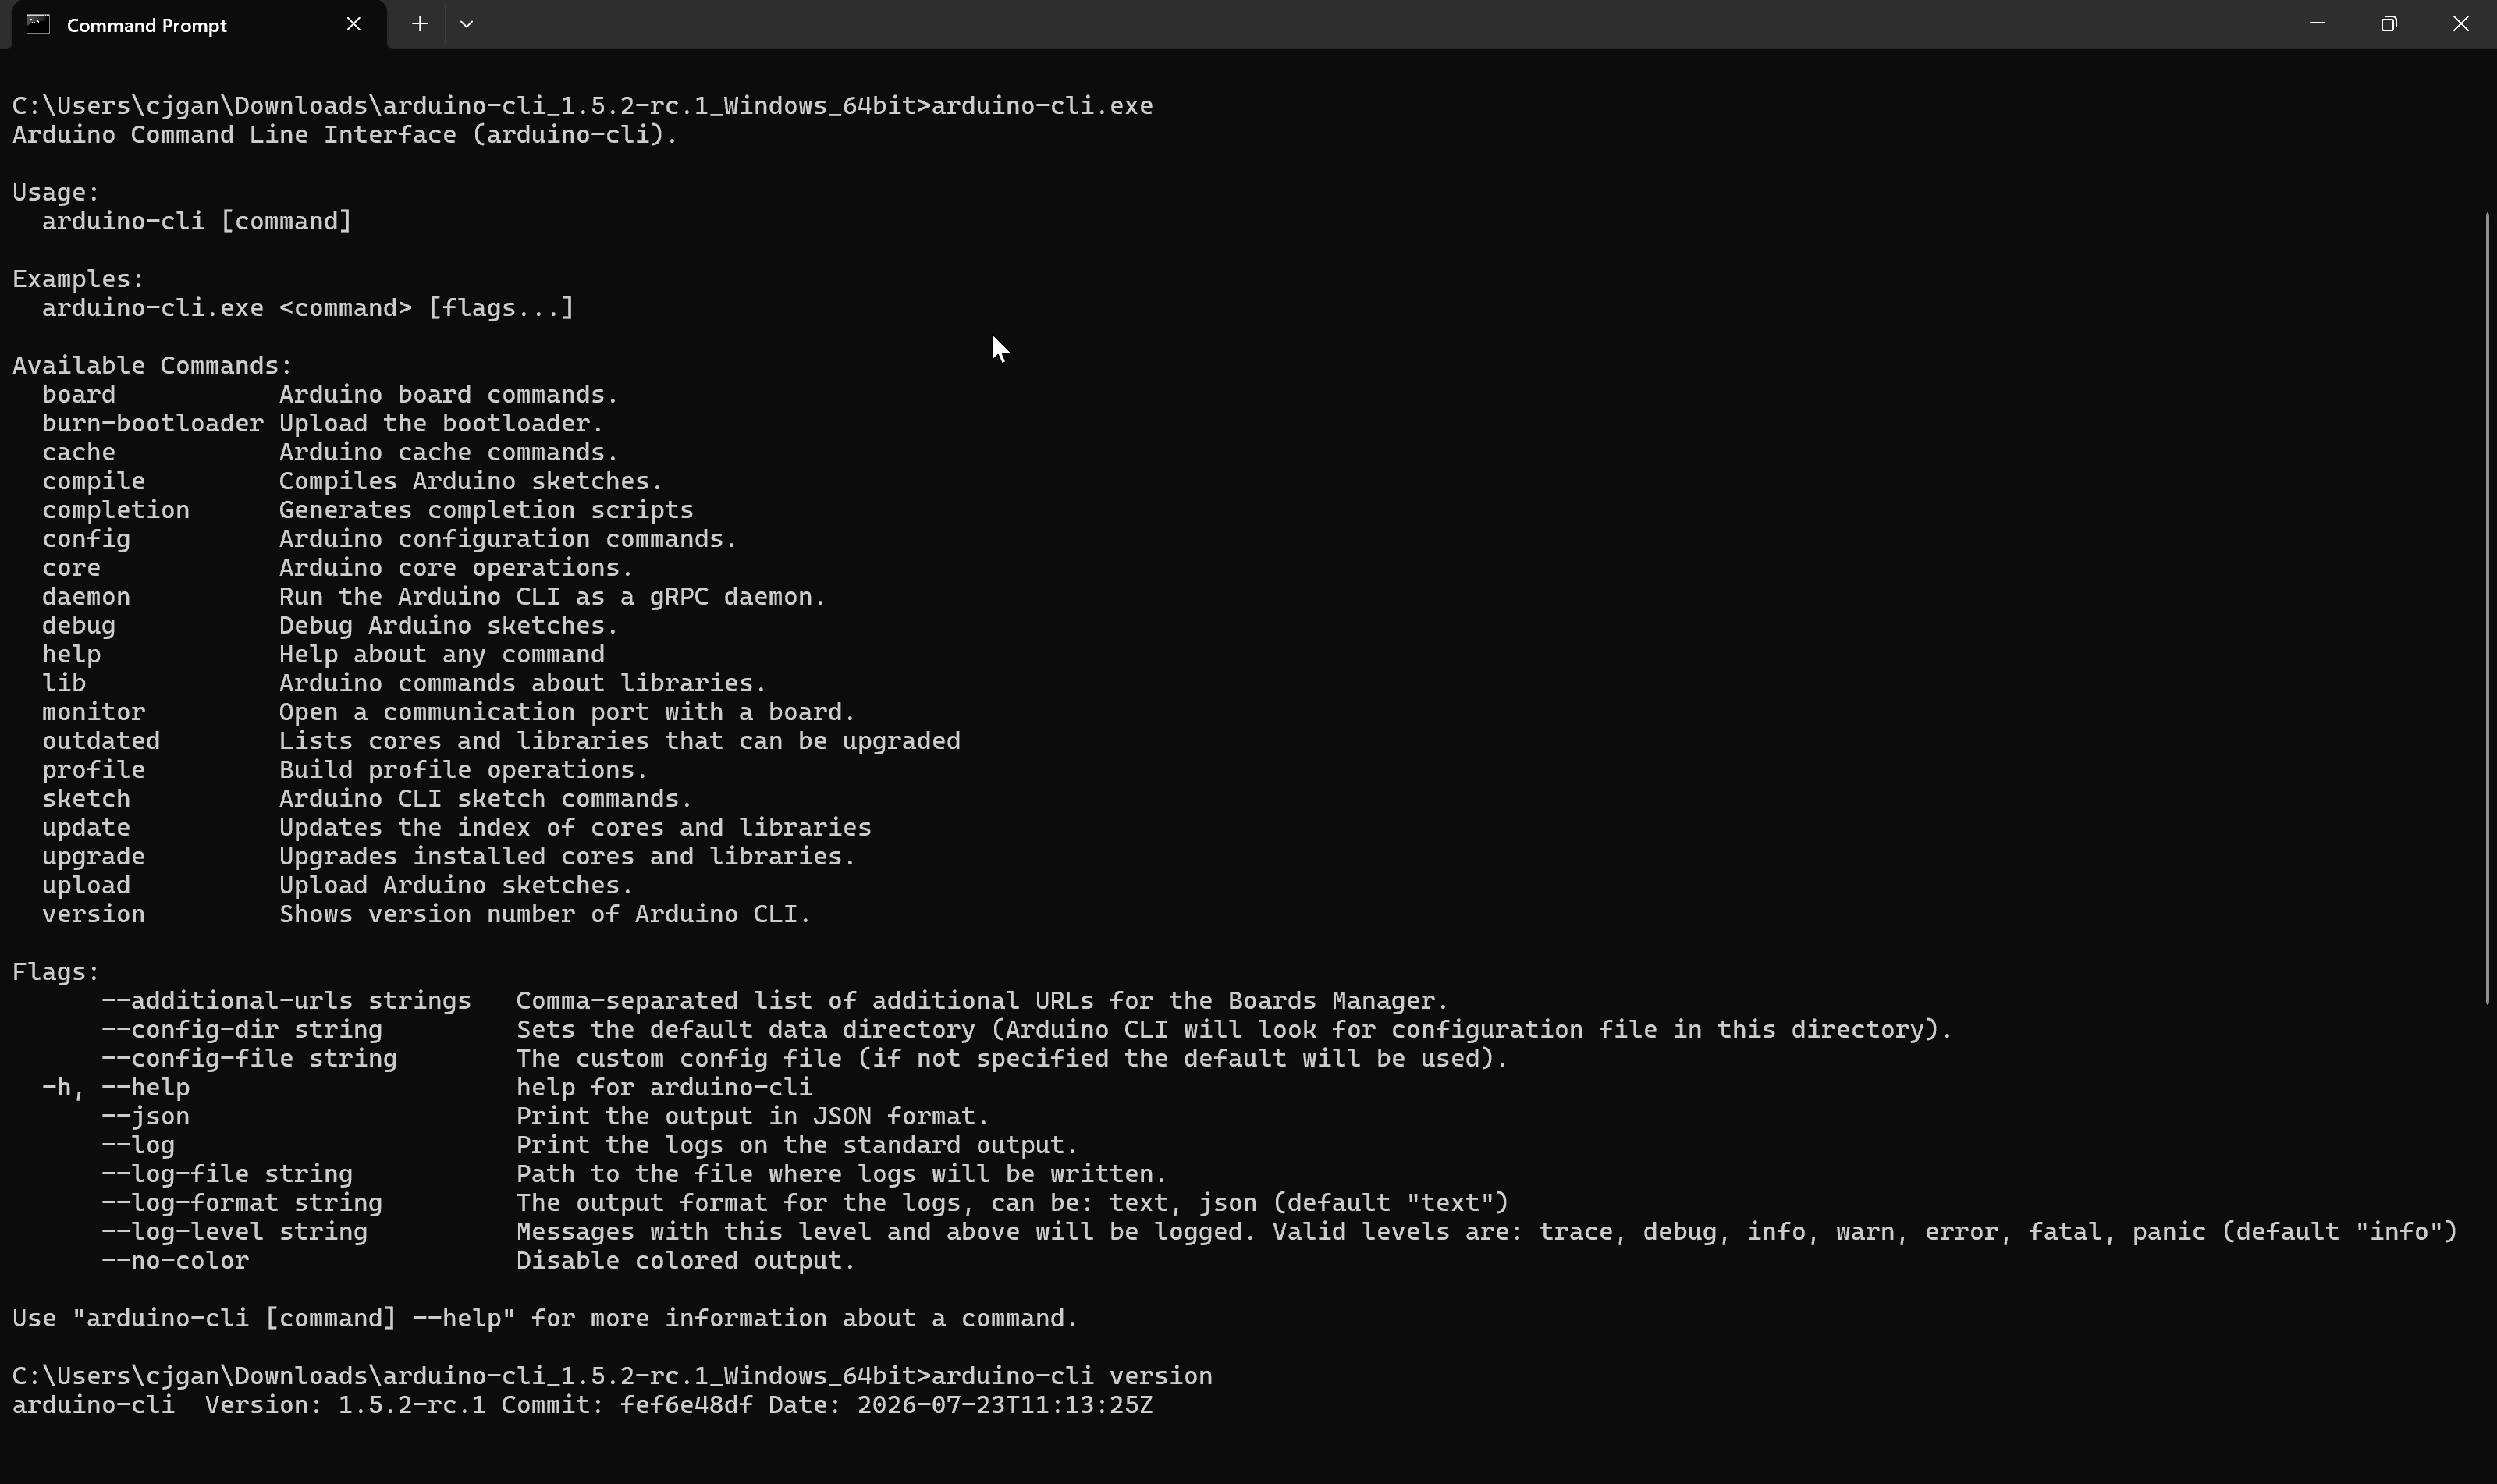
arduino-cli version
You want a version string back, not a red error. If you still get "not recognized," jump to the manual PATH steps under Option B. The MSI sometimes lands the exe somewhere you still have to add by hand.
Option B: the ZIP (portable, no admin, or side-by-side versions).
- Download
arduino-cli_latest_Windows_64bit.zipfrom Arduino's downloads. - Unzip it somewhere stable, not the Downloads folder. I use
C:\tools\arduino-cli\so the path has no spaces and does not vanish when I clean Downloads. - Confirm
arduino-cli.exeis in that folder. -
Add that folder to PATH:
-
Settings → System → About → Advanced system settings → Environment Variables.
-
Under your user variables (or system variables, if you want every account), select Path → Edit → New.
-
Paste
C:\tools\arduino-cli(or wherever you unzipped). -
OK out of every dialog. 5. Close all terminals. Open a new PowerShell. Run
arduino-cli version.
-
Gotcha: do not add the zip file to PATH. Add the folder that contains arduino-cli.exe. And do not leave the exe in C:\Users\you\Downloads\arduino-cli_latest_Windows_64bit\. The first time you clean out Downloads, that copy disappears and the command stops working.
Winget / package managers. Winget is Microsoft's built-in command-line app installer for Windows, and tools like it (Chocolatey, Scoop) can install the CLI too. Those community packages exist, but they sometimes lag behind or drift from Arduino's official release. For a first install I still use Arduino's MSI or ZIP so I know which binary I got.
macOS / Linux, short. Homebrew (the popular free package manager for macOS) makes it two commands: brew update then brew install arduino-cli. Or use Arduino's install script, which needs sh, a standard Unix shell (Git Bash provides one on Windows if you insist on the script there):
# curl downloads Arduino's install script, and "| sh" runs it immediately.
# The script puts the latest CLI into ./bin in the current directory.
curl -fsSL https://raw.githubusercontent.com/arduino/arduino-cli/master/install.sh | sh
Put that bin directory on PATH, or set BINDIR when you run the script. Linux serial ports still need your user in dialout, same as the IDE.
Nightly CLI builds exist, generated daily from master. They are unstable by design. Do not make a nightly your only copy.
Create a config file
Arduino CLI will run without a config. A config saves you from typing the same extra URLs and directories on every command.
# Write the default config. On Windows this usually lands in %LOCALAPPDATA%\Arduino15\
arduino-cli config init
The command prints the path it wrote, typically C:\Users\<you>\AppData\Local\Arduino15\arduino-cli.yaml. That Arduino15 folder is the same neighborhood IDE 2 uses for cores and indexes. YAML is a plain-text settings format that uses indentation to show which setting belongs under which heading. Open the file in a text editor if you want to see the defaults. You do not have to edit it yet.
If config init says a file already exists, leave it. You may already have one from IDE 2 or from an earlier experiment.
Create a sketch from the terminal
A sketch is still a folder with a .ino file of the same name. The CLI can create that boilerplate so you do not invent the folder layout wrong.
# Make a working directory you control, then create a sketch inside it
cd $HOME\Documents\Arduino
arduino-cli sketch new CliBlink
That creates CliBlink\CliBlink.ino with empty setup() and loop(). Open the .ino in any editor. For this guide, make it a blink with a serial banner so you can tell the upload worked:
void setup() {
  // LED_BUILTIN is the onboard LED pin the core defines for this board
  pinMode(LED_BUILTIN, OUTPUT);  // Let that pin drive the LED
  Serial.begin(115200);          // Open serial at 115200 baud
  // One-time banner that proves this CLI-built sketch is the one running
  Serial.println(F("boot: compiled with arduino-cli"));
}

void loop() {
  digitalWrite(LED_BUILTIN, HIGH);  // LED on
  delay(250);                       // Quarter second
  digitalWrite(LED_BUILTIN, LOW);   // LED off
  delay(250);                       // Quarter second, then repeat
}
F() keeps that banner string in flash on AVR, which is the habit Part 3 already pushed. The CLI does not care. The Uno's SRAM budget still does.
Update the index and see the board
On a fresh CLI, the local cache of available cores is empty until you fetch it.
# Download Arduino's package_index.json (the catalog of official cores)
arduino-cli core update-index
Plug the board in with a data-capable USB cable. Then:
# List serial ports the CLI can see right now, and guess the board if it can
arduino-cli board list
On Windows a healthy Uno looks something like COM7 with a board name and an FQBN. If the Port column is empty, that is a cable or driver problem, not a CLI syntax problem. The COM-port article in this cluster is that path. The CLI cannot list a device Windows never created.
board list is "what is plugged in." board listall is "what FQBNs do I know about, plugged in or not."
# Search the catalog of known board names. Useful when list says Unknown
arduino-cli board listall uno
If board list says Unknown but shows a port, upload can still work. You supply the FQBN yourself. For a classic Uno that string is arduino:avr:uno.
Install a core
A core is the compiler and board recipes for a family. AVR (Uno, classic Nano, Mega) is arduino:avr. Install it explicitly even if you think IDE 2 already did. If they share Arduino15, you may see "already installed." That is a success.
# Install Arduino's AVR core and the avrdude / gcc tools it needs
arduino-cli core install arduino:avr

# Confirm it is there
arduino-cli core list
core list shows ID, installed version, latest version, and a human name. If Installed and Latest disagree, arduino-cli core upgrade will pull the newer one.
Search when you do not know the ID:
# Find which core contains the Mega
arduino-cli core search mega
# Find cores for SAMD-based boards (Zero, MKR family, Nano 33 IoT)
arduino-cli core search samd
IDs look like arduino:avr, arduino:samd, esp32:esp32. The part before the colon is the vendor. The part after is the architecture.
Compile and upload
From the directory that contains the CliBlink folder, or with a path to it:
# Compile for an Uno. Does not need the board plugged in
arduino-cli compile --fqbn arduino:avr:uno CliBlink
A first compile is slow. Later ones reuse objects. Success prints program-storage and dynamic-memory use, same numbers the IDE's bottom pane shows. Failure prints the compiler error. Read the first error. You will get exactly the same message the IDE would have shown you, because it is the same compiler producing it. The IDE just puts it in a colored pane.
# Upload the compiled sketch to the board on this serial port
arduino-cli upload --fqbn arduino:avr:uno --port COM7 CliBlink
Replace COM7 with whatever board list printed. On macOS that flag is --port /dev/cu.usbmodem1101. On Linux, --port /dev/ttyACM0 or /dev/ttyUSB0.
You can combine compile and upload:
# Compile, and if it succeeds, upload right away in the same command
arduino-cli compile --fqbn arduino:avr:uno --upload --port COM7 CliBlink
Gotcha: the sketch path is the folder, not the .ino file. arduino-cli compile ... CliBlink.ino is the wrong shape. CliBlink or .\CliBlink is the right one.
If upload fails with a port-busy error, close Serial Monitor in IDE 2, close any other terminal monitor, and try again. The CLI and the IDE cannot own the same COM port at the same time.
Serial Monitor from the CLI
IDE 2's Monitor is a pane. The CLI's monitor is a subcommand.
# Open a serial session at 115200 baud on COM7
arduino-cli monitor --port COM7 --config baudrate=115200
You should see boot: compiled with arduino-cli and then you are watching the board. Exit with Ctrl+C. Baud has to match Serial.begin. Garbage characters are a baud mismatch, same as in the IDE.
This monitor is good enough to prove an upload. It is not Serial Plotter. When I want a graph, I still open IDE 2.
Install a library
Libraries are the same packages Library Manager installs. The CLI talks to that same index.
# Refresh the library catalog
arduino-cli lib update-index

# Search by a word you would type in Library Manager
arduino-cli lib search DHT

# Install by the Library Manager name, in quotes if it has spaces
arduino-cli lib install "DHT sensor library"
That DHT package is the one the DHT22 temperature and humidity article uses on this site. Installing it from the CLI is the same bits as installing it from the IDE's Library Manager, as long as both tools are looking at the same sketchbook and Arduino15 libraries path.
List what you have:
# Show every library installed in this CLI's user directory, with versions
arduino-cli lib list
Uninstall with arduino-cli lib uninstall "DHT sensor library" if you installed the wrong one. Two DHT libraries that both define DHT will collide at compile time, same as in the IDE. The CLI will not save you from that. It will just print the duplicate-class error faster.
Zip libraries still exist. Drop the folder into Documents\Arduino\libraries the way you would for the IDE, or use arduino-cli lib install --zip-path path\to\library.zip when you have a zip and no Library Manager name.
Third-party cores: ESP32 and ESP8266
Board Manager URLs in the IDE live in Preferences. In the CLI they live in the yaml, or on the command as --additional-urls.
Edit arduino-cli.yaml and set:
board_manager:
  additional_urls:
    - https://espressif.github.io/arduino-esp32/package_esp32_index.json
    - https://arduino.esp8266.com/stable/package_esp8266com_index.json
Then:
# Re-download the indexes, now including Espressif's and the ESP8266 community's
arduino-cli core update-index
# Confirm the ESP32 core is now visible
arduino-cli core search esp32
# Install it (large download: compilers and tools)
arduino-cli core install esp32:esp32
Passing the URL once, without editing yaml, looks like this. You must repeat the flag on every command that needs that index, which is why the yaml is less painful after the first afternoon:
# Same two steps, with the extra index passed on the command line instead of in the yaml
arduino-cli core update-index --additional-urls https://espressif.github.io/arduino-esp32/package_esp32_index.json
arduino-cli core install esp32:esp32 --additional-urls https://espressif.github.io/arduino-esp32/package_esp32_index.json
FQBN for a generic DevKit is often esp32:esp32:esp32. board listall esp32 will list the rest. Upload to ESP still has the BOOT-button and cable issues the IDE has, because the CLI runs the very same esptool uploader over the very same USB cable.
How the CLI and IDE 2 share a machine
Default data dir on Windows: %LOCALAPPDATA%\Arduino15. Default sketchbook: Documents\Arduino. If you already used IDE 2, the CLI will usually see the cores and libraries you installed there after core list and lib list. If it does not, you have two configs pointing at two directories.
# Dump the config the CLI is using, including paths
arduino-cli config dump
Look at directories.data and directories.user. If those are not the folders IDE 2 is using, you will get "core not installed" in one tool and a fine compile in the other. Point them at the same place, or pick one tool as the installer of cores and stay consistent.
I treat IDE 2 as the Serial Plotter and the autocomplete editor, and the CLI as compile/upload/script. They get along if you do not fight over the COM port.
Compile flags worth knowing
Default compile is enough for Blink. These flags save pain on the second week.
# Rebuild from scratch. Use this when you changed a file and the hex looks stale
arduino-cli compile --fqbn arduino:avr:uno --clean CliBlink

# Ask the compiler to nag. "all" is noisy and useful
arduino-cli compile --fqbn arduino:avr:uno --warnings all CliBlink

# Write the .hex / .bin next to the sketch, so you can archive or flash it later
arduino-cli compile --fqbn arduino:avr:uno --export-binaries CliBlink

# Print the recipe: compiler path, includes, defines. This is how you debug a bad core
arduino-cli compile --fqbn arduino:avr:uno --verbose CliBlink
--export-binaries lands files under CliBlink\build\arduino.avr.uno\. The .hex is what avrdude would send to an Uno. If you ever need to give someone "the firmware" without giving them the source, that file is it. --verbose is long. Scroll for the first error: the same way you would in the IDE's bottom pane.
--build-property lets you override a single recipe knob (baud, extra defines) without editing boards.txt. I leave that for the day a default recipe is wrong. Most people never need it for Uno work.
Compile the same sketch for more than one board
This is where the CLI saves you time. In the IDE, switching boards means Tools → Board, wait, Verify, then Tools → Board again. Two board names is two commands.
# AVR Uno
arduino-cli compile --fqbn arduino:avr:uno CliBlink

# Classic Nano (same ATmega328P chip as the Uno, different board recipe)
arduino-cli compile --fqbn arduino:avr:nano CliBlink
Both can succeed on the same source if you stuck to LED_BUILTIN and did not hard-code Mega-only pins. One can fail. That failure is the point: you found a board-specific problem on your machine, not after you mailed an untested Nano hex.
A small PowerShell loop, when you are tired of repeating yourself:
# Board names to compile. Add a line when you add a board.
$boards = @(
  "arduino:avr:uno",
  "arduino:avr:nano"
)
foreach ($fqbn in $boards) {                 # Run the block once per board name
  Write-Host "=== $fqbn ==="                 # Print a header so the output is easy to scan
  arduino-cli compile --fqbn $fqbn CliBlink  # Compile for this board
  # Stop the whole loop the moment one board fails
  if ($LASTEXITCODE -ne 0) { throw "compile failed for $fqbn" }
}
$LASTEXITCODE is PowerShell's "did the last program succeed?" 0 means yes. A non-zero exit is how a future GitHub Action will fail the job. You are already practicing that habit.
Upload still needs a port per board. Compile does not. I compile everything first, then plug in the Uno, then the Nano.
Sketch folders, extra files, and where not to put them
The CLI is strict about sketch layout because the Arduino build system is strict.
-
The folder name and the main
.inoname must match:CliBlink\CliBlink.ino. -
Extra
.inofiles in that folder get glued together, end to end, into one big file before compiling (the compiler sees them as a single "translation unit," its term for one chunk of source it compiles in one go). Extra.cppand.hfiles get compiled as their own separate units. That is how bigger projects grow without stuffing everything into one file. -
Libraries do not go inside the sketch folder unless you mean
CliBlink\src\or alibrariessubfolder the build system recognizes. RandomFoo.zipsitting next to the.inowill be ignored, and you will thinklib installfailed. -
Spaces in the path work more often than they used to, and they still make verbose logs harder to read.
C:\work\CliBlinkis easier thanC:\Users\you\My Documents\Arduino stuff\CliBlink.
arduino-cli sketch new gets the names right. If you create the folder by hand and the compile error says it cannot find a sketch, check the folder/file names first.
CLI vs Arduino IDE: when to use which
| Job | I use |
|---|---|
| First week of Arduino, ever | IDE 2 |
| Blink, serial debug, Plotter | IDE 2 |
| Compile the same sketch for Uno and Nano without changing menus | CLI |
| Install a core on a fresh lab PC | CLI |
| Edit with VS Code, build with Arduino's compiler | CLI (VS Code article later) |
| Live debugger on a Zero / SAMD with a probe | IDE 2 |
| Compile on a server with no GUI | CLI |
The CLI does not write better firmware than the IDE. It is the same compiler. What it adds is repeatability. When a build is a typed command, you can save it, share it, and run it again next month exactly the same way. When a build is a series of clicks, you are relying on remembering which board and which options you picked last time.
A compact command cheat sheet
arduino-cli version                          # Is it installed and on PATH?
arduino-cli config init                      # Create the config file (once)
arduino-cli core update-index                # Refresh the catalog of cores
arduino-cli core install arduino:avr         # Install Uno / Nano / Mega support
arduino-cli core list                        # What cores do I have?
arduino-cli board list                       # What is plugged in, and on which port?
arduino-cli board listall uno                # Look up a board's FQBN by name
arduino-cli sketch new CliBlink              # Create a sketch folder + .ino
arduino-cli compile --fqbn arduino:avr:uno CliBlink                 # Build it
arduino-cli upload --fqbn arduino:avr:uno --port COM7 CliBlink      # Flash it
arduino-cli monitor --port COM7 --config baudrate=115200            # Watch Serial
arduino-cli lib update-index                 # Refresh the library catalog
arduino-cli lib search DHT                   # Find a library by keyword
arduino-cli lib install "DHT sensor library" # Install it by its exact name
arduino-cli lib list                         # What libraries do I have?
arduino-cli help <command> is the rest of the manual.
Troubleshooting
| Symptom | Likely cause | Fix |
|---|---|---|
arduino-cli is not recognized |
Not on PATH, or old terminal | Add the folder that contains the exe. Close all terminals. Open a new one |
core install cannot find arduino:avr |
Index never fetched | core update-index first |
board list empty |
Cable, driver, or board not enumerating | Same USB path as the IDE. Data cable, Device Manager |
Compile: Unknown FQBN |
Typo, or core not installed | core list, then board listall |
Compile: No such file on a header |
Library not installed in this CLI's user dir | lib install, then config dump and compare with the IDE |
| Upload cannot open port | IDE Monitor or another program owns COM | Close Monitor. Unplug/replug. Try --port again |
| IDE compiles, CLI says core missing | Two different Arduino15 folders |
config dump vs IDE preferences. Align directories.data |
| ESP core search empty | Additional URL not in yaml | Add Espressif's JSON to board_manager.additional_urls, then core update-index |
| First compile is "stuck" | Downloading a toolchain | Wait. Watch the terminal. It is often fetching gcc |
Wrap-up
Arduino CLI is the engine Arduino IDE 2 is sitting on. Install the Windows MSI or a ZIP on PATH, run config init, fetch the index, install arduino:avr, and you can compile and upload from any terminal. The FQBN replaces Tools → Board. --port replaces Tools → Port. lib install replaces Library Manager. The USB cable still has to be a data cable.
Keep the IDE for Plotter, for autocomplete, and for the first week. Use the CLI when the clicks are the thing you are tired of, or when a computer with no mouse needs to build the same sketch you just built at the bench.
Next in this cluster: a short command reference, then CLI with VS Code, then compiling on every git commit. Official flags and the current version always live on Arduino's CLI docs. When a flag in this article ages, trust that page.
Hack The World and Make Awesome.




