

Serial Monitor is a text window attached to the same USB-serial port you uploaded over. Your sketch writes to it with Serial.print and Serial.println. You can type back if the sketch reads Serial. It is the first debugging tool most Arduino users have, and it is still the one I use most.
Part 3 of the Mastery Series introduces Serial as part of learning sketches. Part 7 is Serial as a method: banners, states, and not guessing. This article is the Monitor itself: baud, line endings, timestamps, a few print habits, fake data, and how to read a line back.
Open it and match baud
In IDE 2: toolbar Serial Monitor button, or Tools → Serial Monitor. It docks at the bottom. That is different from 1.8.x, where it was often a floating window.
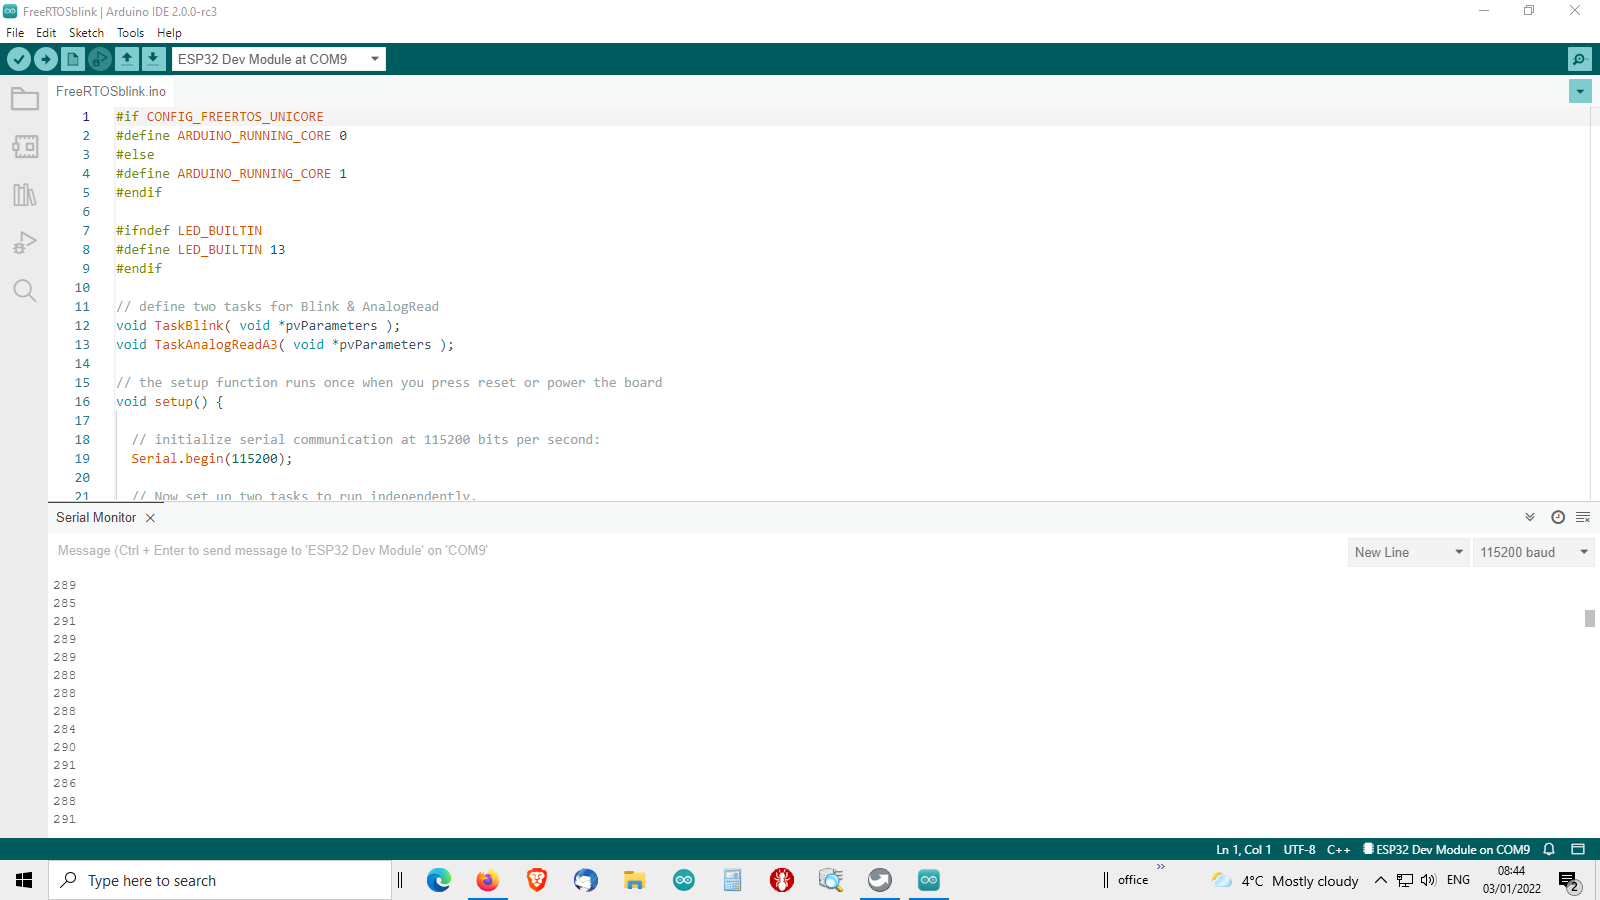
Baud rate is bits per second on that serial link. The number in the Monitor drop-down must match Serial.begin(...) in the sketch. Serial.begin(115200) plus Monitor at 9600 is garbage characters, not a broken UART (the serial hardware inside the chip). I use 115200 unless a library's example used 9600 and I have not changed both sides yet.
On a classic Uno, Serial is the USB-serial chip. On native-USB boards (Leonardo, Micro, some 32-bit boards), Serial is USB itself. Those boards can wait in setup() with while (!Serial) { ; } so they do not print before the Monitor opens. On an Uno that wait does nothing useful. Do not copy it onto an Uno "because a SAMD example had it."
Only one program should own the port. Close Plotter, close a second IDE, close PuTTY (a popular standalone serial terminal for Windows). Upload can fail if Monitor is stuck holding the port. In IDE 2, closing the Monitor tab is the usual fix. Close it before a long Board Manager install too.
Line endings
The Monitor send box has a line-ending setting: No line ending, Newline (\n), Carriage return (\r), Both (\r\n).
If the sketch reads characters until it sees '\n', and you send 1 with "No line ending," the sketch waits forever. If you send Newline and the sketch only wanted '1', it may see '1' then '\n' and get confused.
For a first "type 1 to turn the LED on" sketch, Newline is the usual choice, and the sketch should skip extra \r and \n.
Timestamps
IDE 2 can show a timestamp on each line. Turn it on when you are correlating events (button, then LED, then print). Turn it off when you are copying output into a spreadsheet and the extra column is noise.
Timestamps are added by the IDE. They are not on the wire. The board did not send them.
Print habits that keep you sane
Print a boot banner from setup() so you know which sketch is running:
void setup() {
  Serial.begin(115200);                 // Must match the Monitor's baud setting
  Serial.println(F("boot: dht22-v3"));  // Unique name + version for THIS sketch
}
F() keeps the string in flash (the big program memory) on AVR so it does not eat SRAM (the Uno's tiny 2 KB of working memory). Change the banner when you change the sketch. If Monitor still says boot: dht22-v2, you uploaded a different window's code.
Print labels, not bare numbers:
Serial.print(F("temp_c="));  // The label, with no line break after it
Serial.println(tempC);       // The value, then a line break
A column of 23.4 is not enough at 2 a.m. temp_c=23.4 is.
Print state, not only sensors: state=IDLE / state=HEAT. Part 7 is that method in full.
Do not print inside a tight loop at 115200 without a pace. You will flood the Monitor, miss the line you care about, and slow the sketch. Print on change, or every 200–500 ms using millis().
Fake sensor data
You do not need a DHT22 to practice Monitor. Fake a temperature that wanders:
void setup() {
  Serial.begin(115200);                  // Open serial at 115200 baud
  Serial.println(F("boot: fake-temp"));  // Boot banner
}

void loop() {
  // A slow sine-ish wobble around 22 C, no sensor required.
  // sin() swings between -1 and +1, so this drifts between 19 and 25.
  float t = 22.0 + 3.0 * sin(millis() / 3000.0);
  Serial.print(F("temp_c="));  // Label first
  Serial.println(t, 2);        // Then the value, 2 decimal places
  delay(200);                  // Five lines per second is easy to read
}
If that prints, USB, baud, and the sketch are fine. Then swap in a real read. If the real read prints nothing, the bug is the sensor or the library, not Monitor.
Parsing what you type
A small command sketch. Type 1 or 0 and Newline:
void setup() {
  pinMode(LED_BUILTIN, OUTPUT);            // Onboard LED becomes an output
  Serial.begin(115200);                    // Match the Monitor's baud
  Serial.println(F("boot: type 1 or 0"));  // Tell the user what to do
}

void loop() {
  // available() = how many characters are waiting to be read. 0 means nothing typed yet.
  if (Serial.available() > 0) {
    char c = Serial.read();                // Take ONE character out of the queue
    if (c == '1') {                        // Did they type a 1?
      digitalWrite(LED_BUILTIN, HIGH);     // LED on
      Serial.println(F("led=on"));         // Confirm what happened
    } else if (c == '0') {                 // Did they type a 0?
      digitalWrite(LED_BUILTIN, LOW);      // LED off
      Serial.println(F("led=off"));
    }
    // Anything else, including the \r and \n a line ending adds, is simply ignored
  }
}
If nothing happens, check line ending and that you clicked in the send box. If you get led=on and no LED, you printed success and the pin is still wrong. Believe the print. Then check LED_BUILTIN vs a discrete LED on another pin.
Monitor vs Plotter vs debugger
Monitor is text. Plotter is numbers as a graph (next article in this set). The IDE 2 debugger pauses the chip on supported boards. A classic Uno does not get that debugger over the USB-serial chip you already have. For an Uno, Monitor plus Part 7 is debugging.
Troubleshooting
| Symptom | Likely cause | Fix |
|---|---|---|
| Garbage text | Baud mismatch | Match Monitor to Serial.begin |
| Nothing at all | Wrong port, sketch has no prints, native USB opened too late | Boot banner. Correct COM. Reset the board after opening Monitor |
| Upload fails with Monitor open | Port busy | Close the Monitor tab, upload, open again |
| Typed commands ignored | Line ending, or sketch not reading | Newline. Serial.available in loop() without a long delay |
Wrap-up
Serial Monitor is text over the same USB link you upload through. Match baud, print a banner, label your values, do not flood loop(). Fake data proves the window. Real sensors come after. Line endings matter as soon as you type back.
Hack The World and Make Awesome.




